All blog posts
Labelbox•December 14, 2023
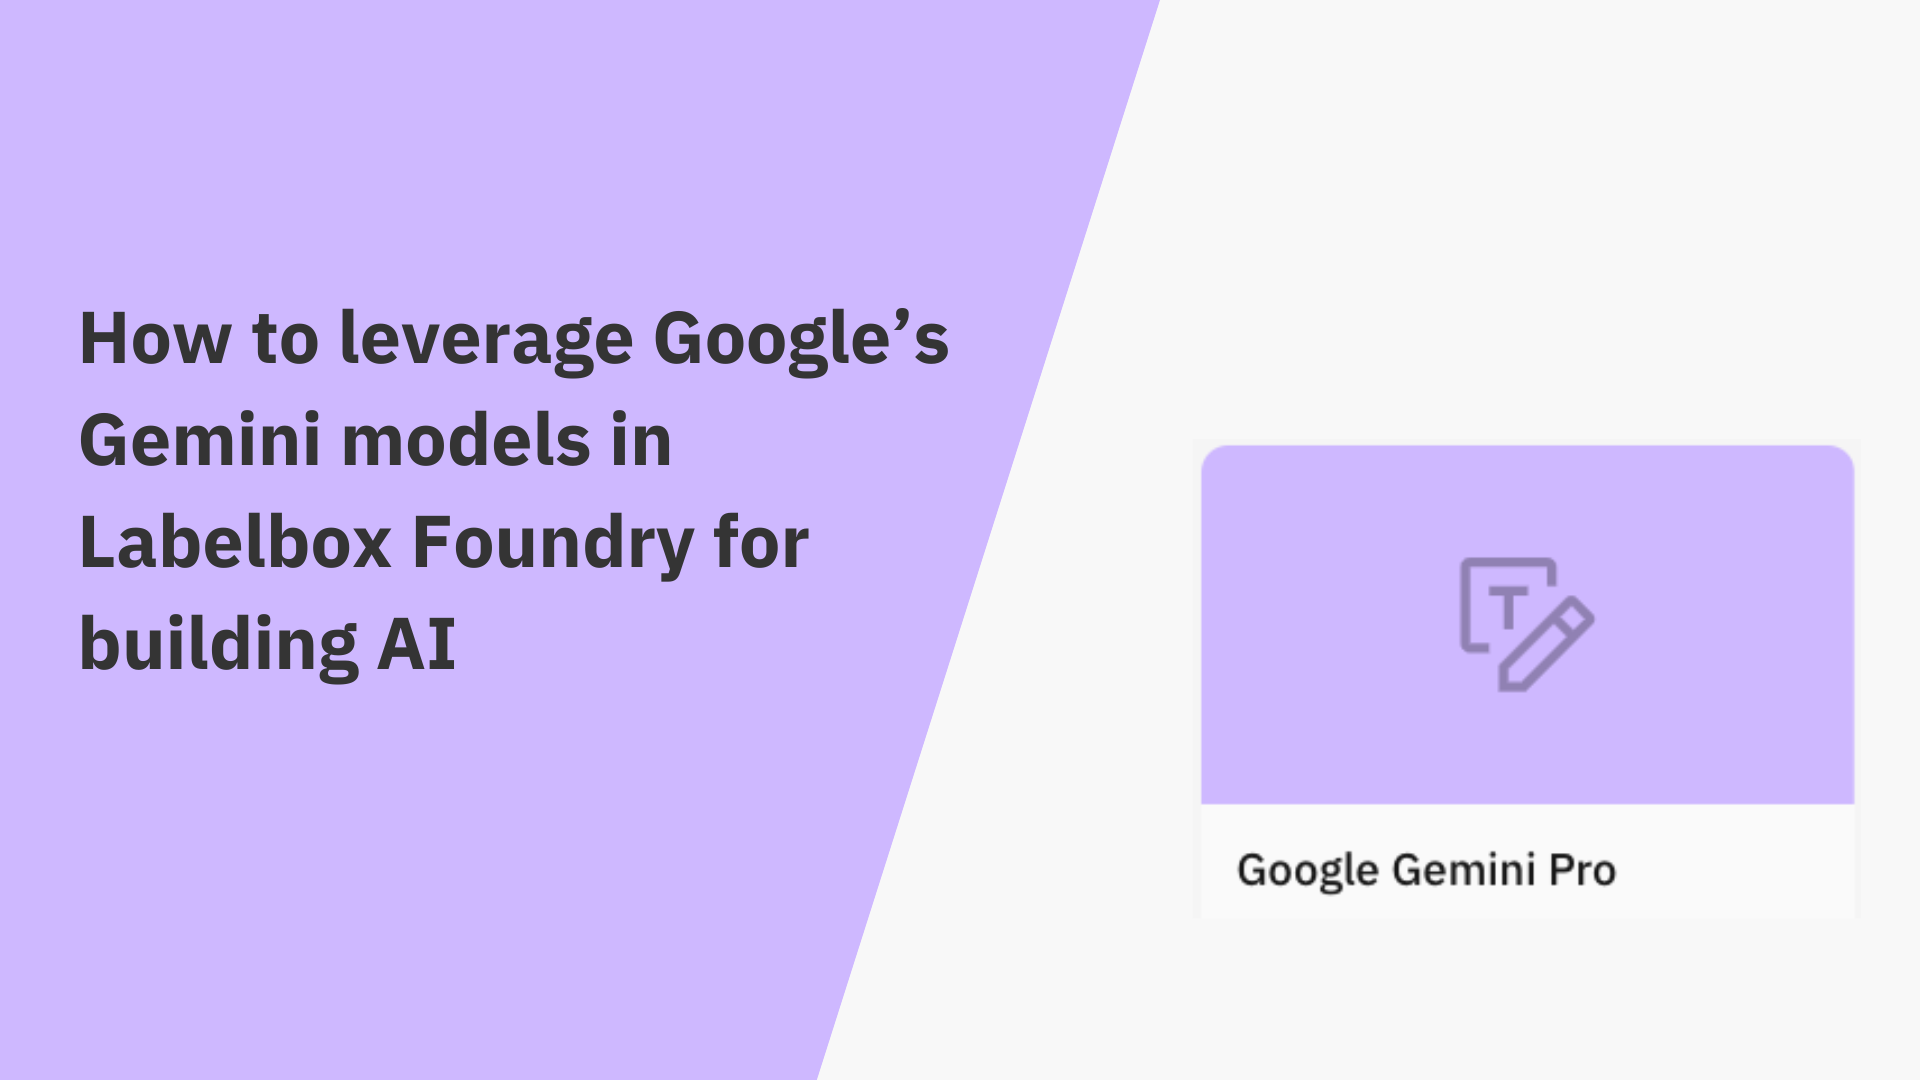
How to leverage Google’s Gemini models in Labelbox Foundry for building AI
Gemini is Google's most powerful AI model to date. It was announced on December 6th, 2023, and officially made available to developers on December 13th, 2023. The multi-modal model can process and understand text, images, audio, and code. Gemini is capable of a wide range of tasks, including:
- Machine translation: Gemini can translate languages with greater accuracy than previous models
- Image generation: Gemini can generate realistic images from text descriptions
- Music composition: Gemini can create original music pieces
- Code generation: Gemini can generate code in multiple programming languages
- Answering questions: Gemini can answer your questions in an informative way, even if they are open-ended, challenging, or strange
Gemini is available in three variants:
- Gemini Ultra — the largest and most capable model for highly complex tasks
- Gemini Pro — the best model for scaling across a wide range of tasks
- Gemini Nano — the most efficient model for on-device tasks
Read on to learn how you can easily evaluate both Gemini Pro and Gemini Pro for vision models, compare them to other powerful foundation models like Open AI’s GPT-4, and choose the best model for your use case with Foundry in Labelbox.
How to leverage Gemini in Foundry
Step 1: Select text assets and choose a foundation model of interest
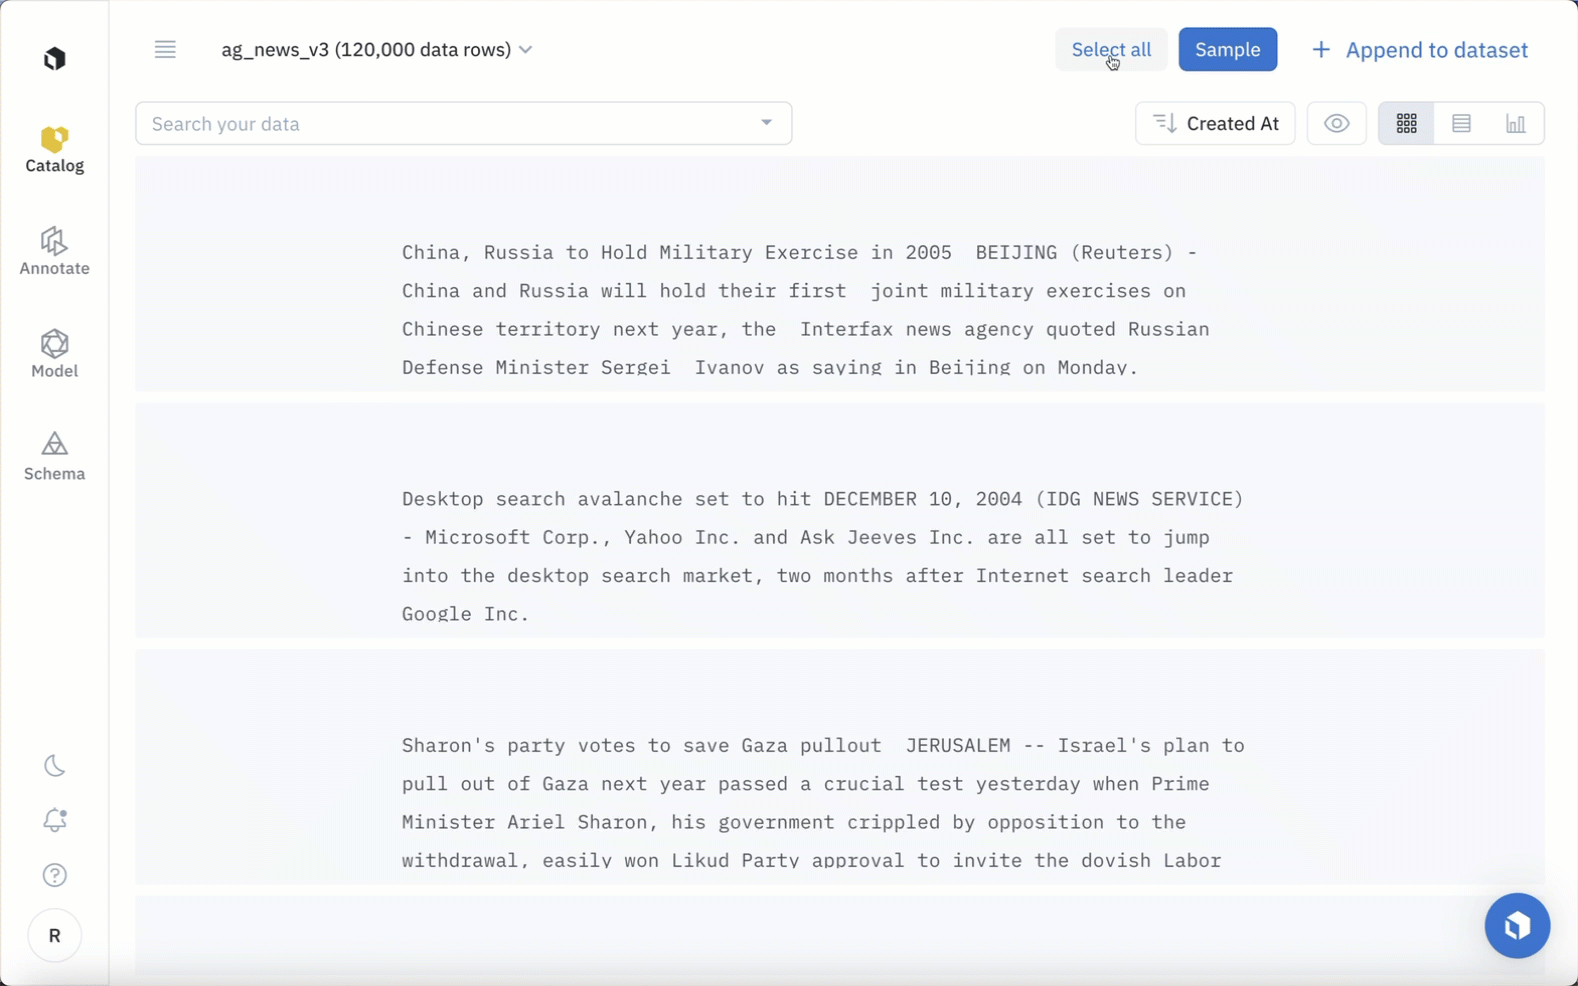
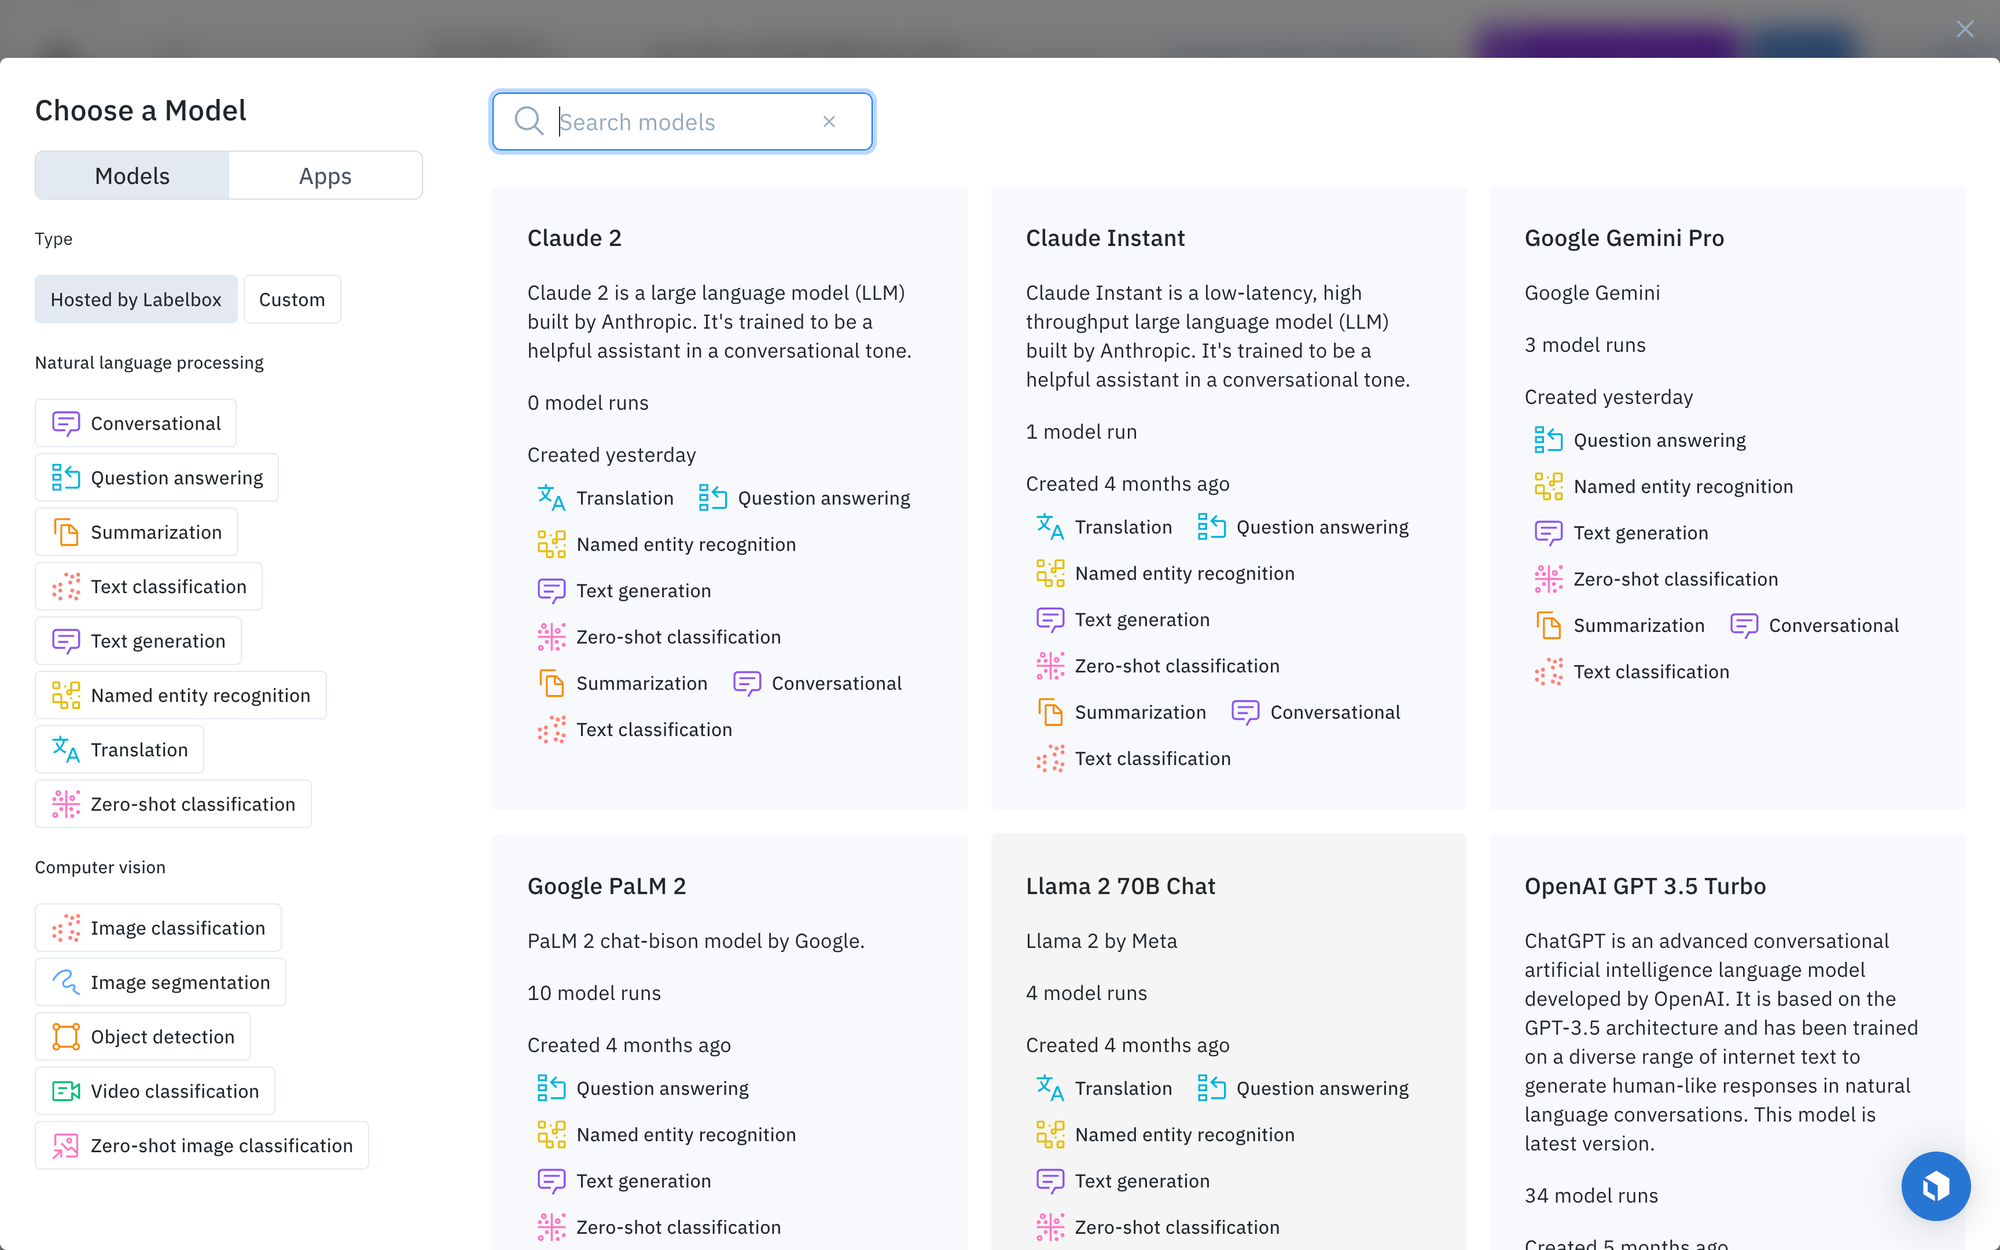
To narrow in on a subset of data by leveraging Catalog’s filters, including media attribute, a natural language search, and more, to refine the text on which predictions should be made. Once you’ve surfaced data of interest, click “Predict with Foundry.”You will then be prompted to choose a model that you wish to use in the model run.
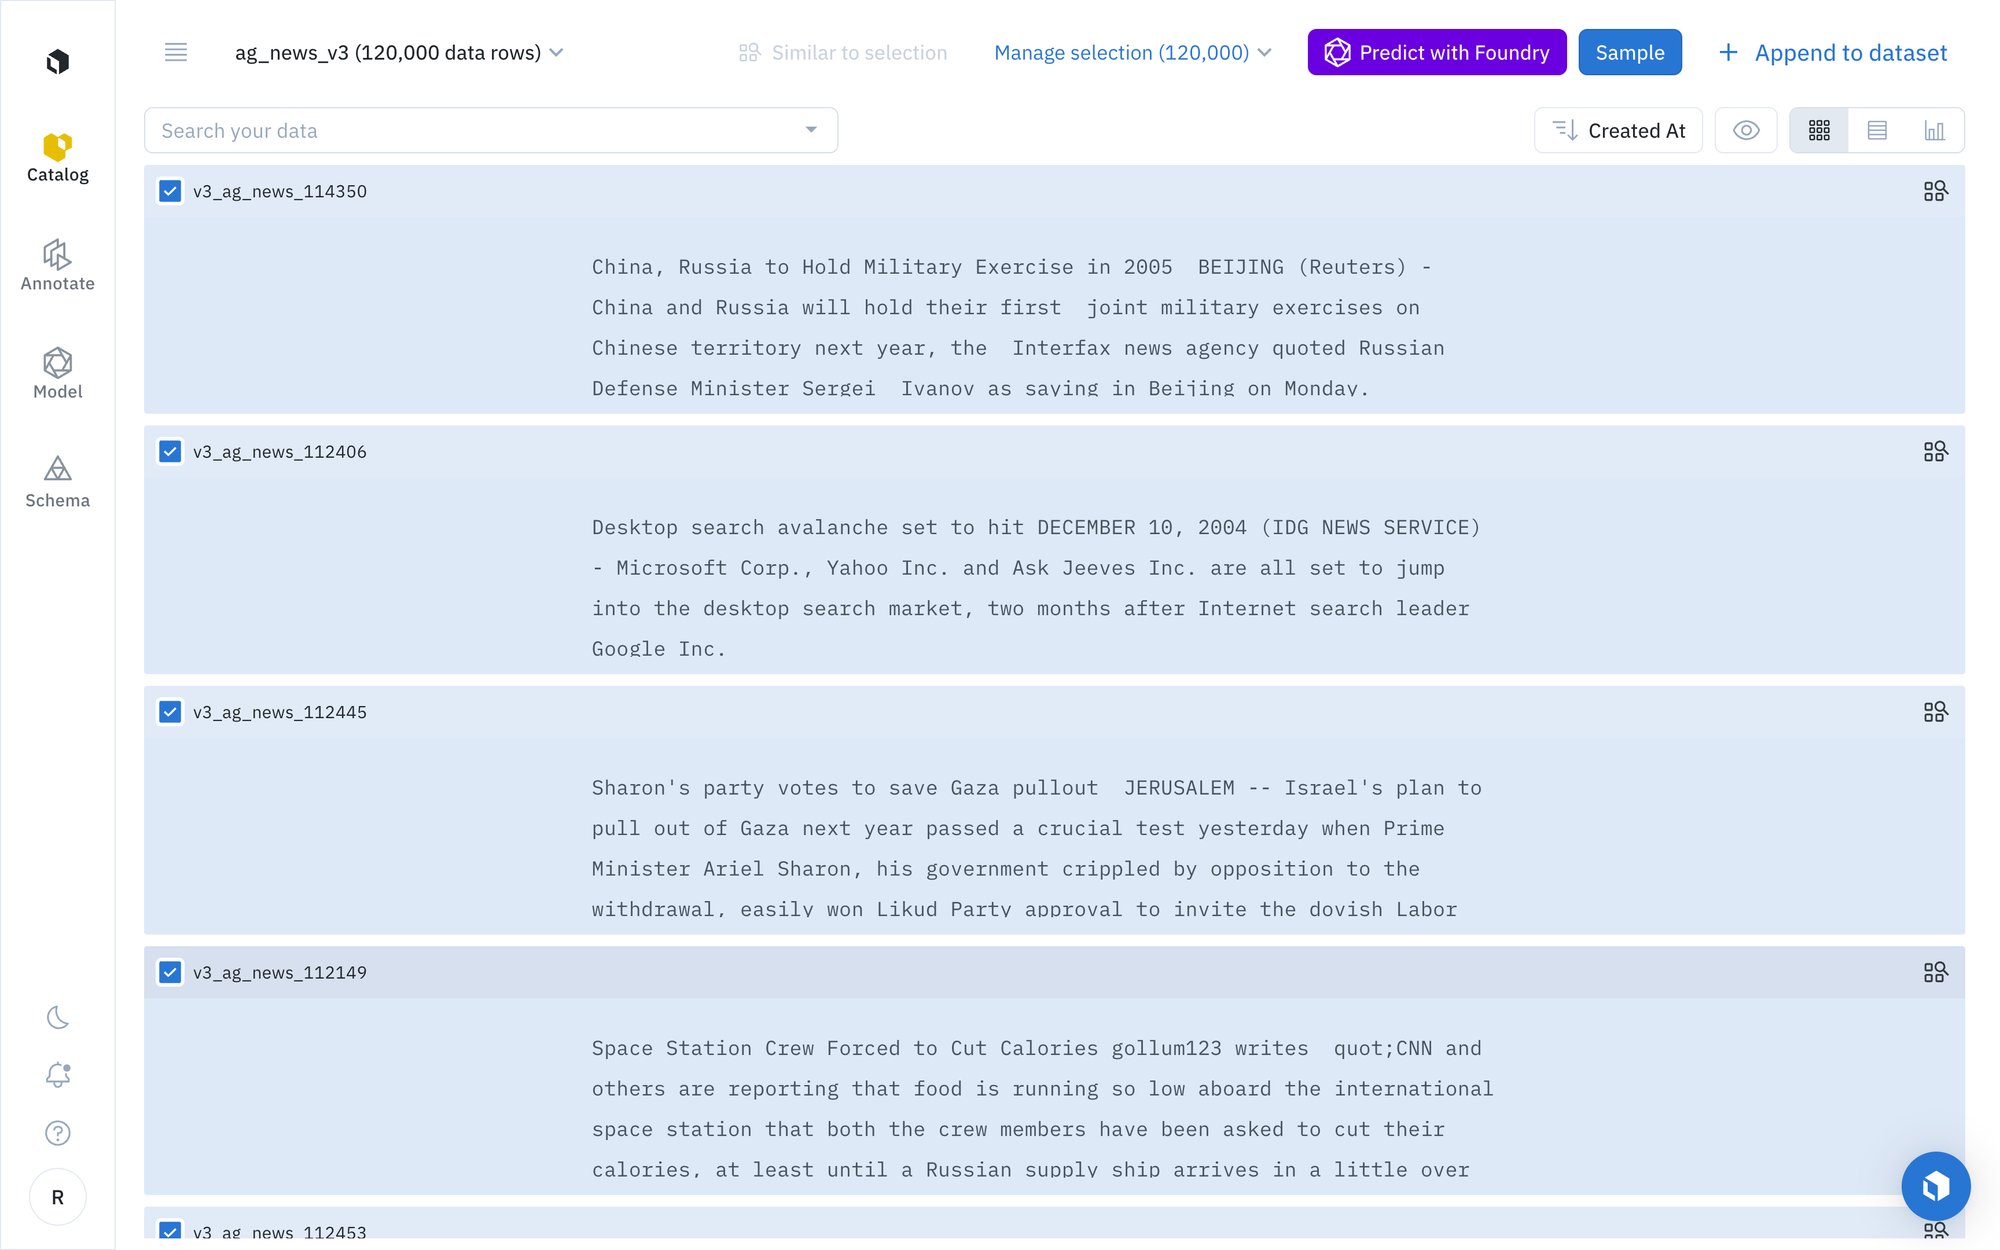
Select a model from the model gallery based on the type of task, such as text classification, summarization, and text generation.
To locate a specific model, such as Gemini Pro, you can browse the models displayed in the list, search for a specific model by name, or select individual scenario tags to show the appropriate models available for the machine learning task.
Step 2: Configure model hyperparameters and submit a model run
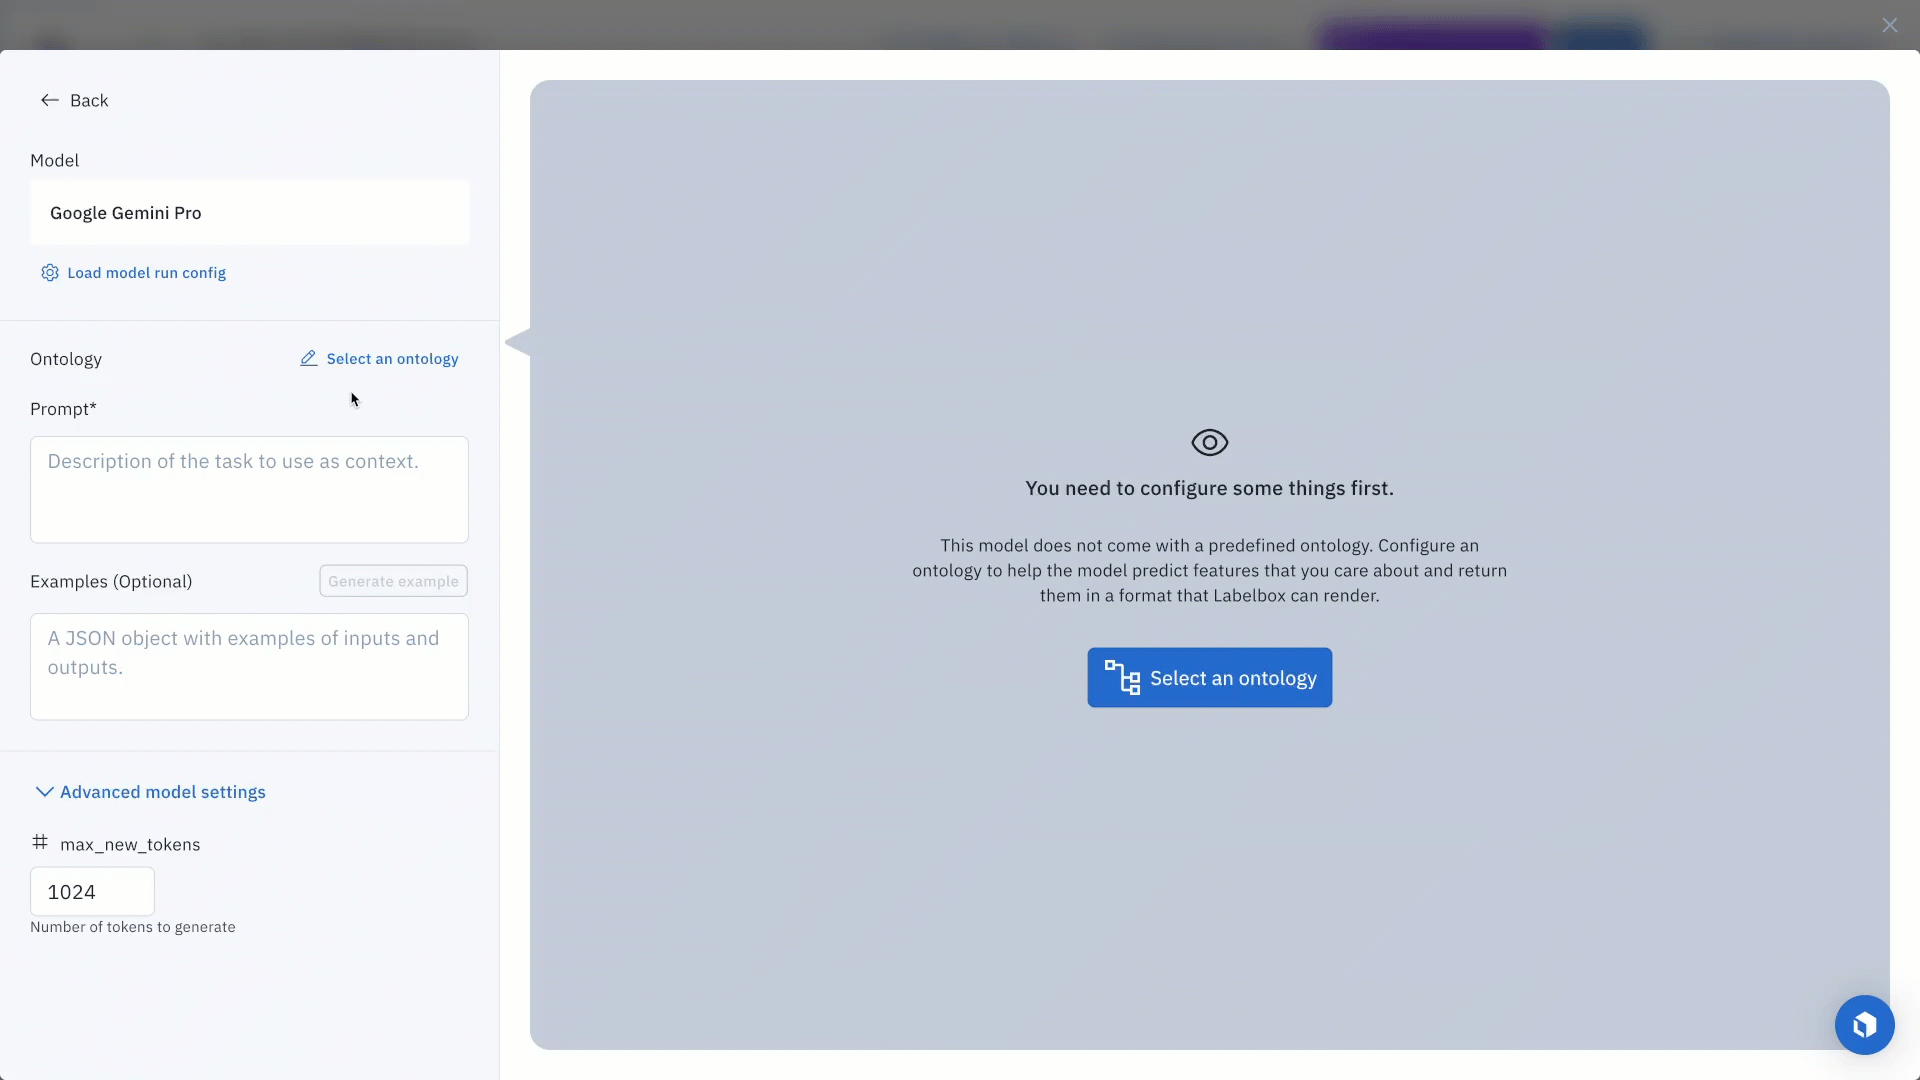
Once you’ve located a specific model of interest, you can click on the model and set the model and ontology settings or prompt. For this example, we will enter the following prompt:
“For the given text, answer the following. Classify topic, pick one of the options: [World, Sports, Business, Science & Tech]. Return the result as a JSON object. {"topic" : "<prediction>"}.”
This prompt is designed to facilitate responses from the model with one of the following: World, Sports, Business, or Science & Tech.
Each model has an ontology defined to describe what it should predict from the data. Based on the model, there are specific options depending on the selected model and your scenario. For example, you can edit a model ontology to ignore specific features or map the model ontology to features in your own (pre-existing) ontology.
Each model will also have its own set of hyperparameters, which you can find in the Advanced model setting. To get an idea of how your current model settings affect the final predictions, you can generate preview predictions on up to five data rows.
While this step is optional, generating preview predictions allows you to confidently confirm your configuration settings. If you’re unhappy with the generated preview predictions, you can make edits to the model settings and continue to generate preview predictions until you’re satisfied with the results. Once you’re satisfied with the predictions, you can submit your model run.
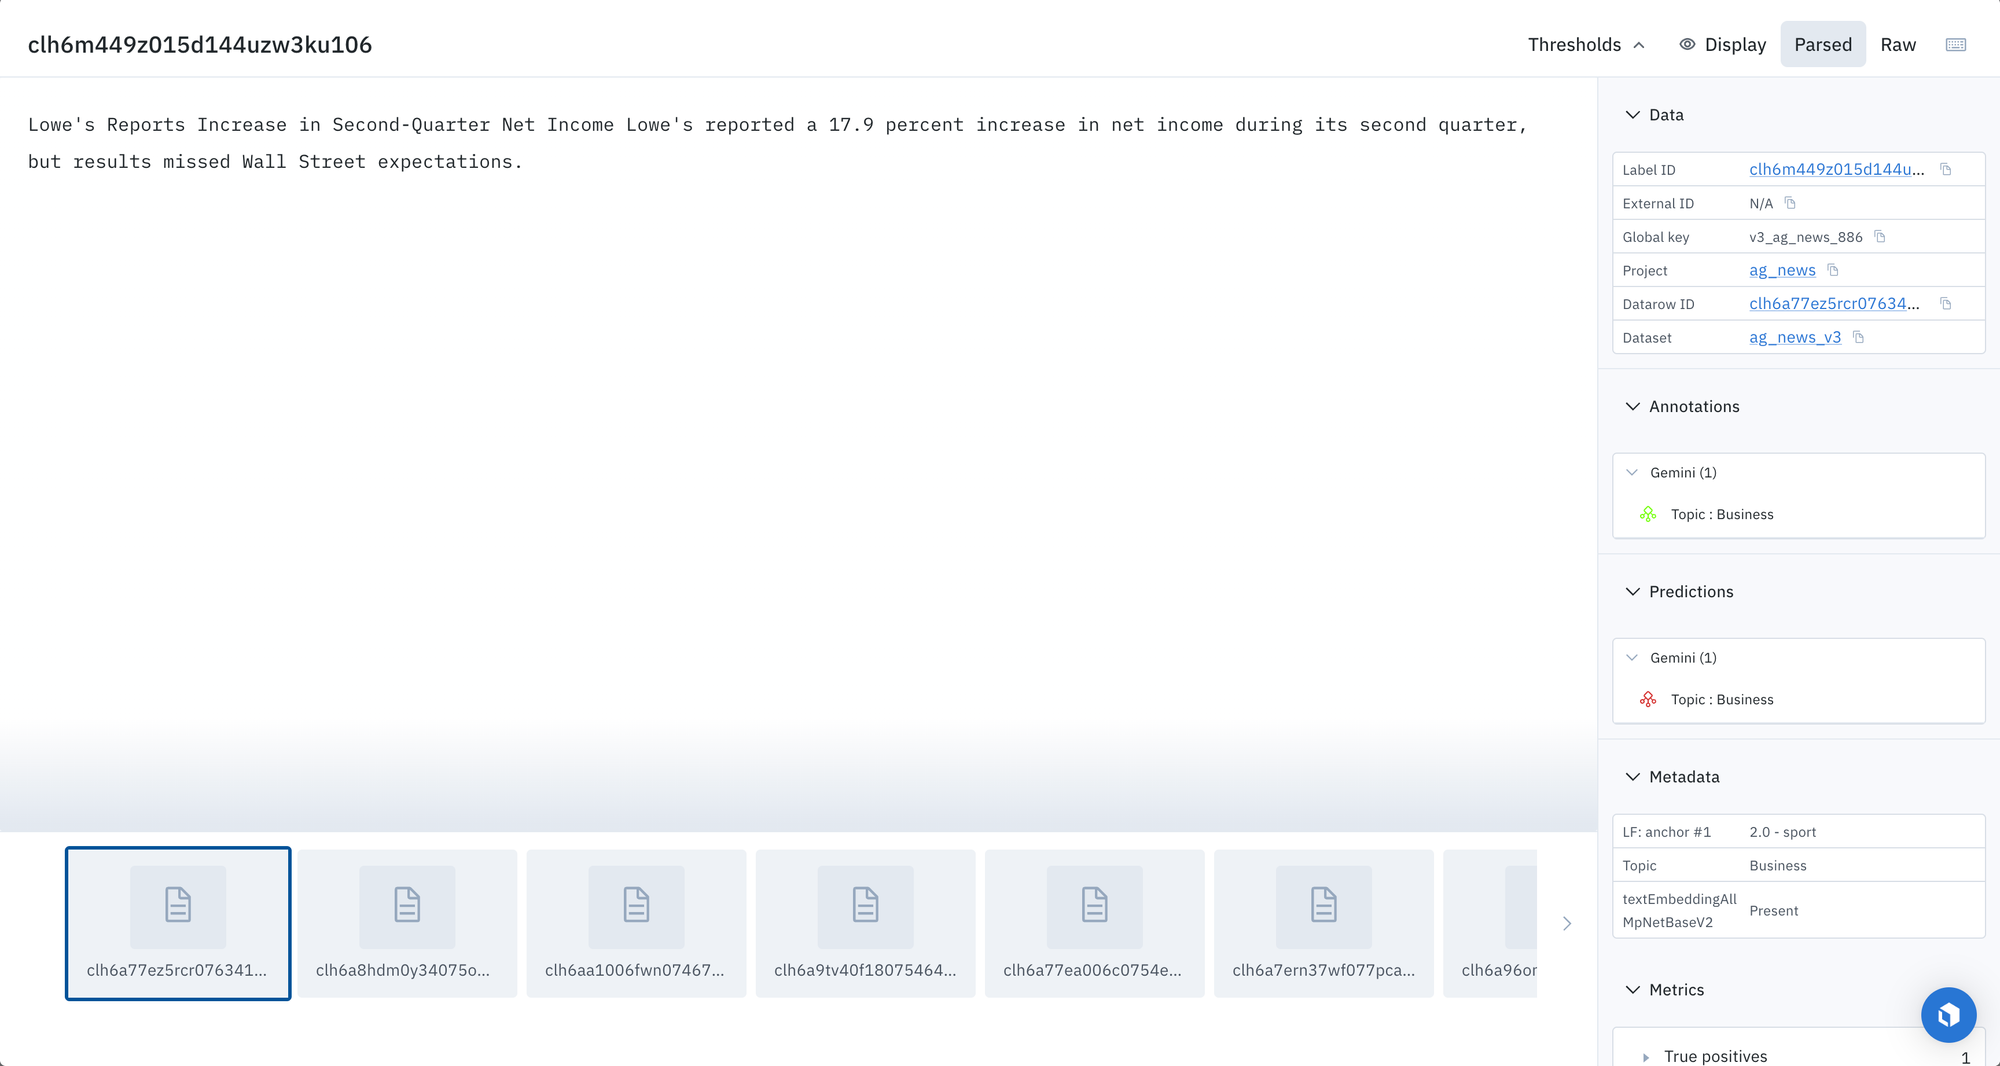
Step 3: Predictions will appear in the Model tab
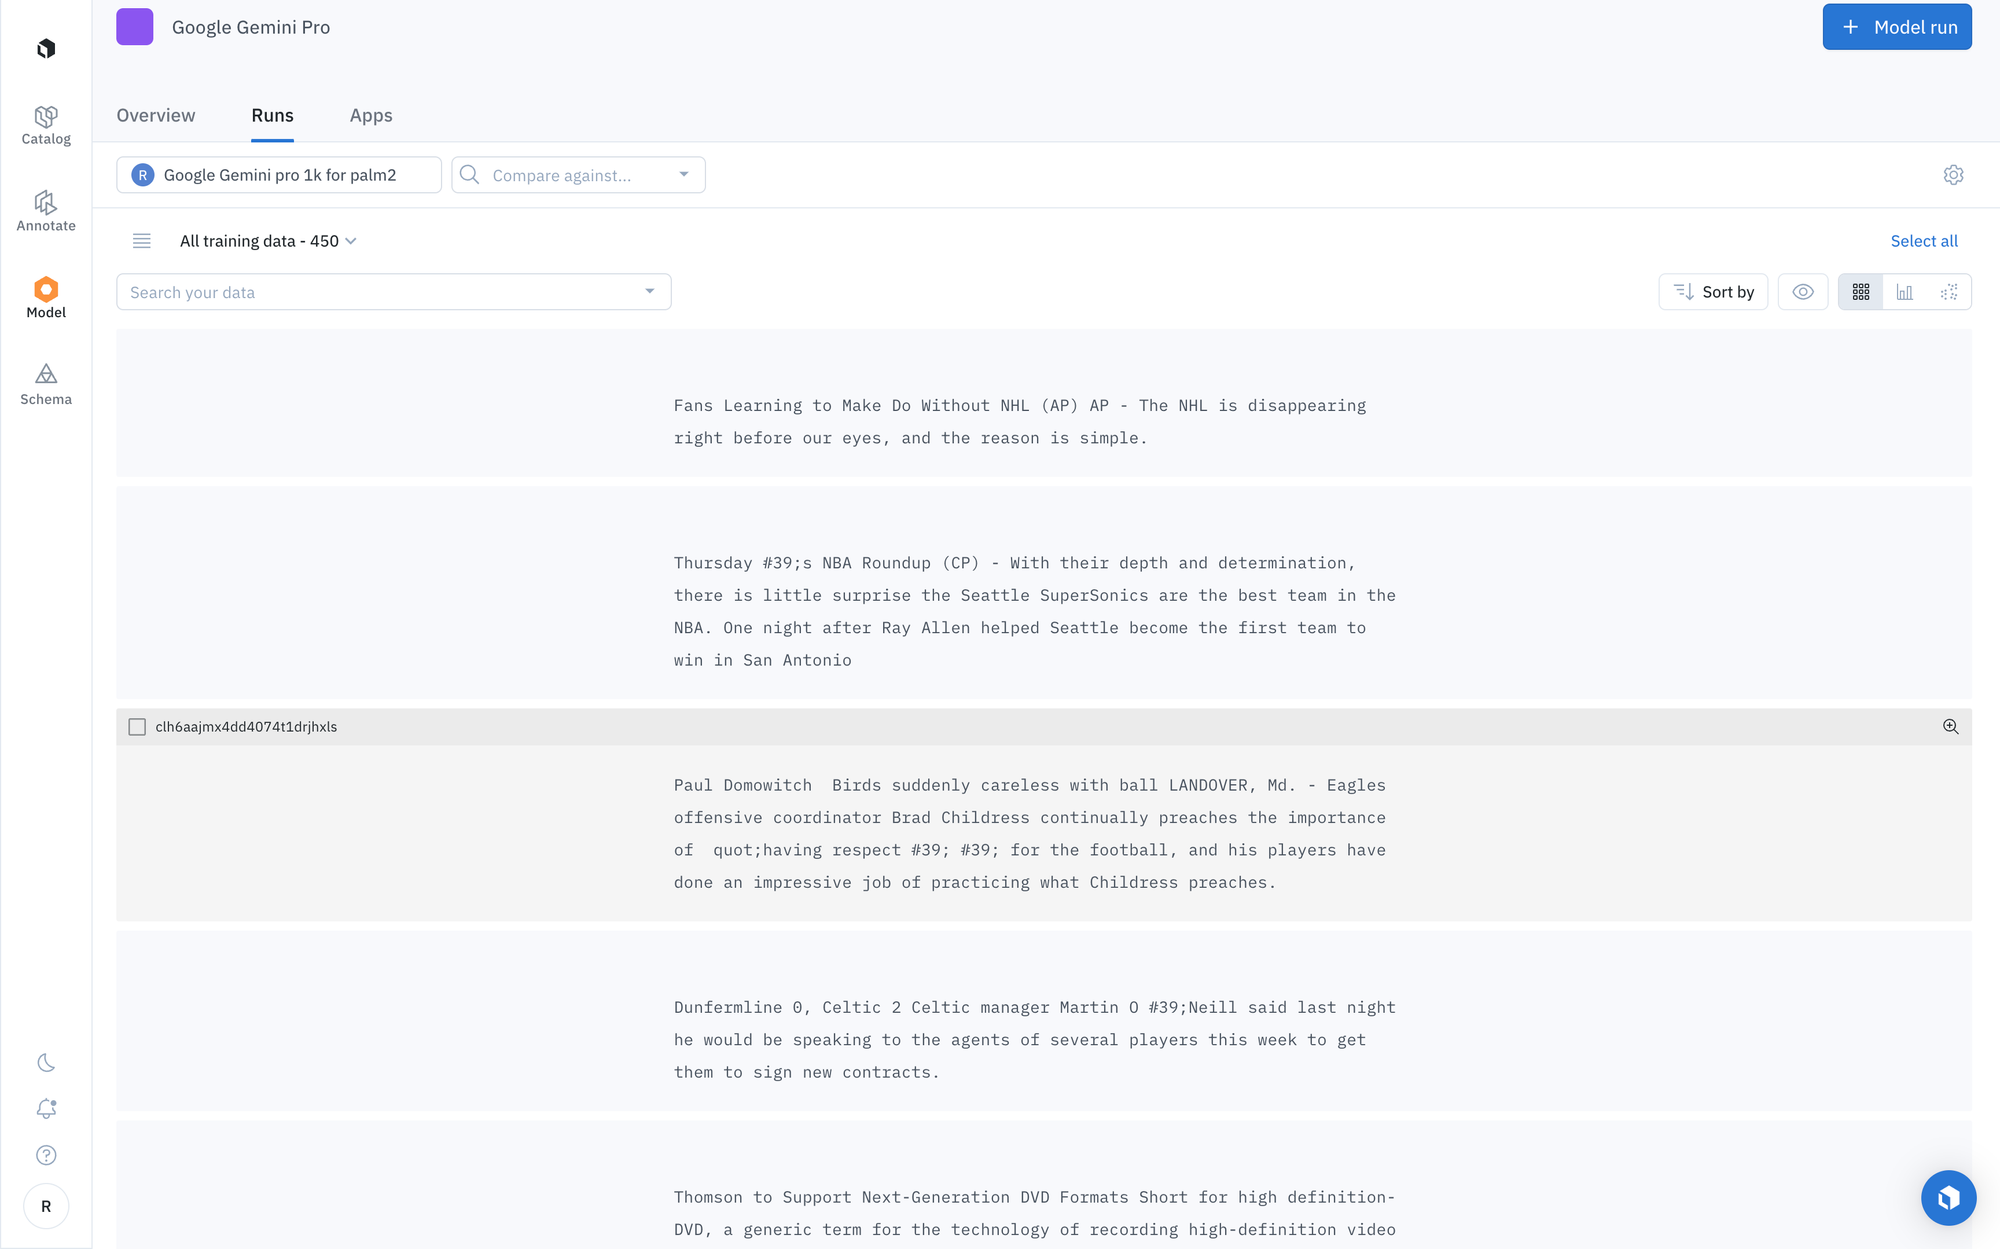
Each model run is submitted with a unique name, allowing you to distinguish between each subsequent model run. When the model run completes, you can complete the following actions:
- View prediction results
- Compare prediction results across a variety of model runs different models
- Use the prediction results to pre-label your data for a project in Labelbox Annotate
Step 4: Create a model run with predictions and ground truth
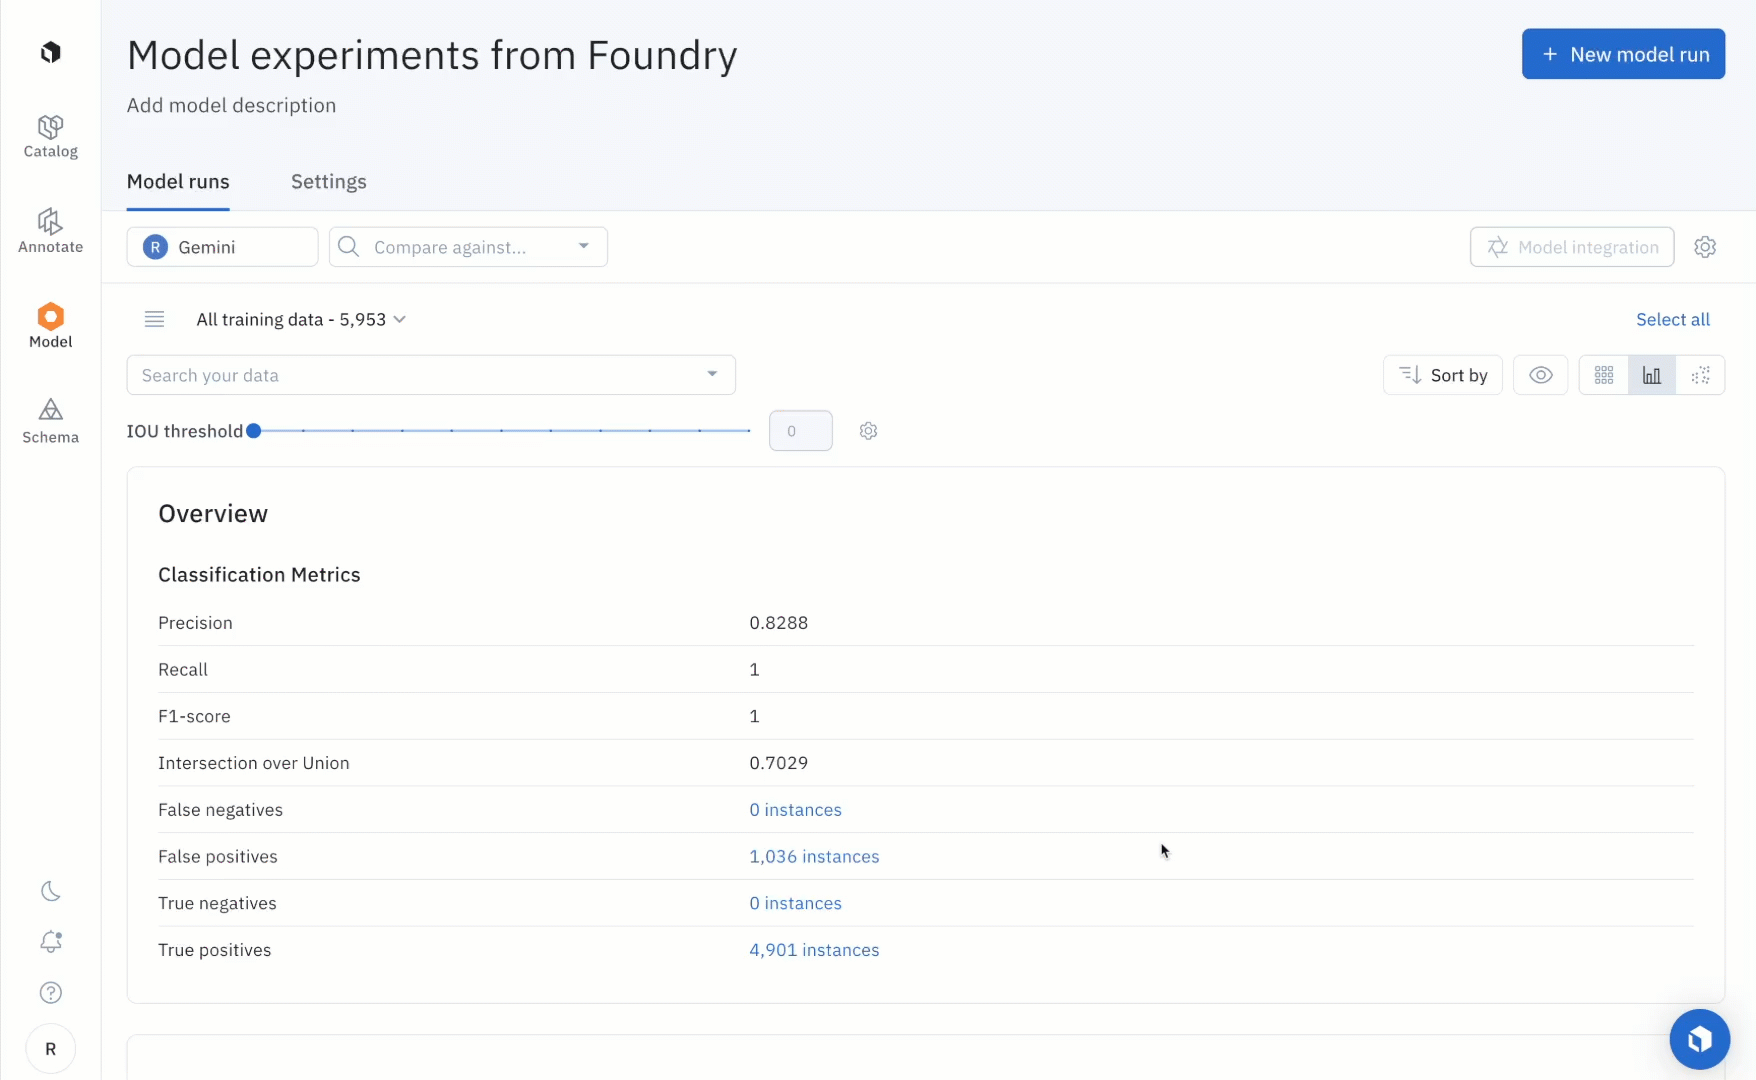
To create a model run with model predictions and ground truth, you’ll have to use a script to import the predictions from Foundry and ground truth labels from a project into a new model run.
In the near future, this will be possible via the UI, and the script will be optional.
After running the notebook, users can use the “Metrics view” to drill into crucial model metrics such as confusion matrix, precision, recall, F1 score, and more to surface model errors.
Model metrics are auto-populated and interactive. You can click on any chart or metric to open up the gallery view of the model run and see corresponding examples.

Google’s Gemini models are some of the most powerful foundation models available to AI builders to date. With Foundry, you can now explore their capabilities, compare their performance to other models, and leverage them for pre-labeling, data enrichment, and much more. Try it today for free.