All guides
How to automatically ingest data from Databricks into Labelbox
Moving data seamlessly through your MLOps pipeline is essential to building successful AI products. In this guide, learn how you can leverage Labelbox’s Databricks pipeline creator to automatically ingest data from your Databricks domain into Labelbox for data exploration, curation, labeling, and much more.
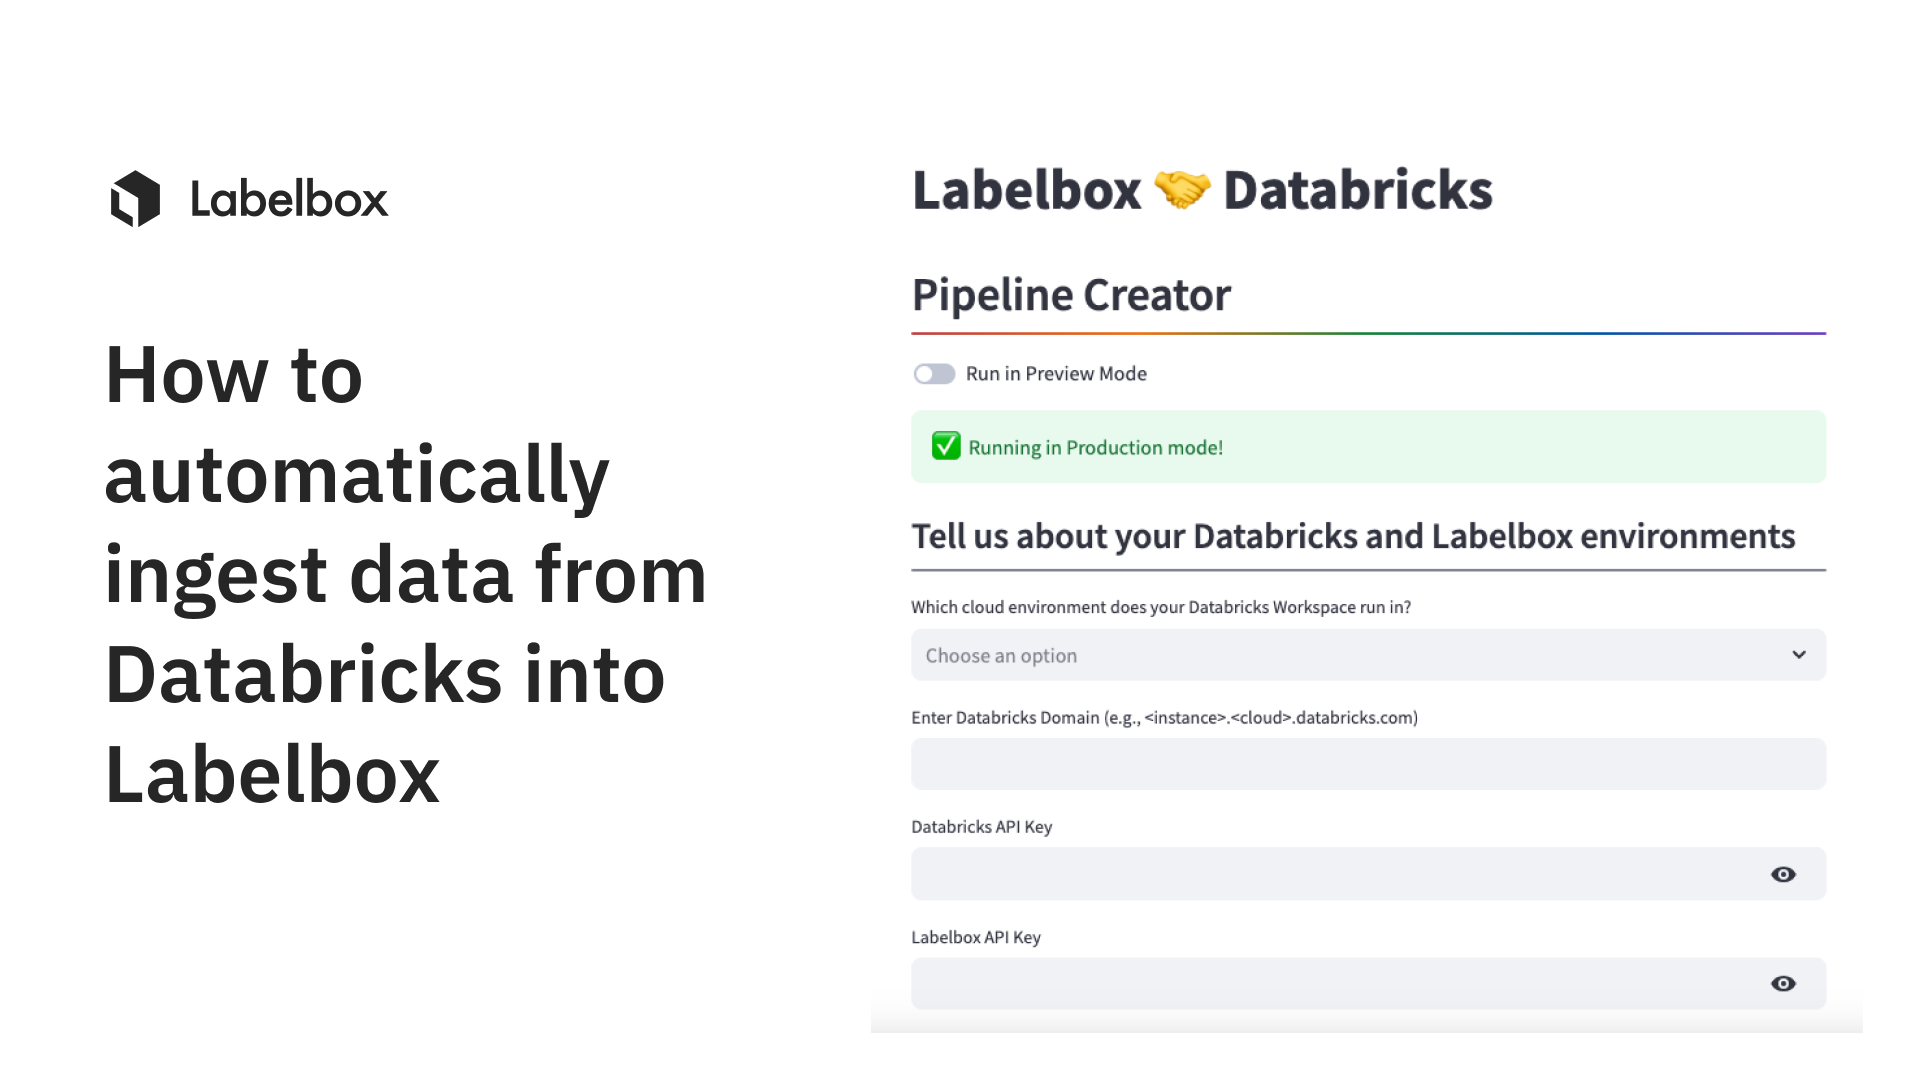
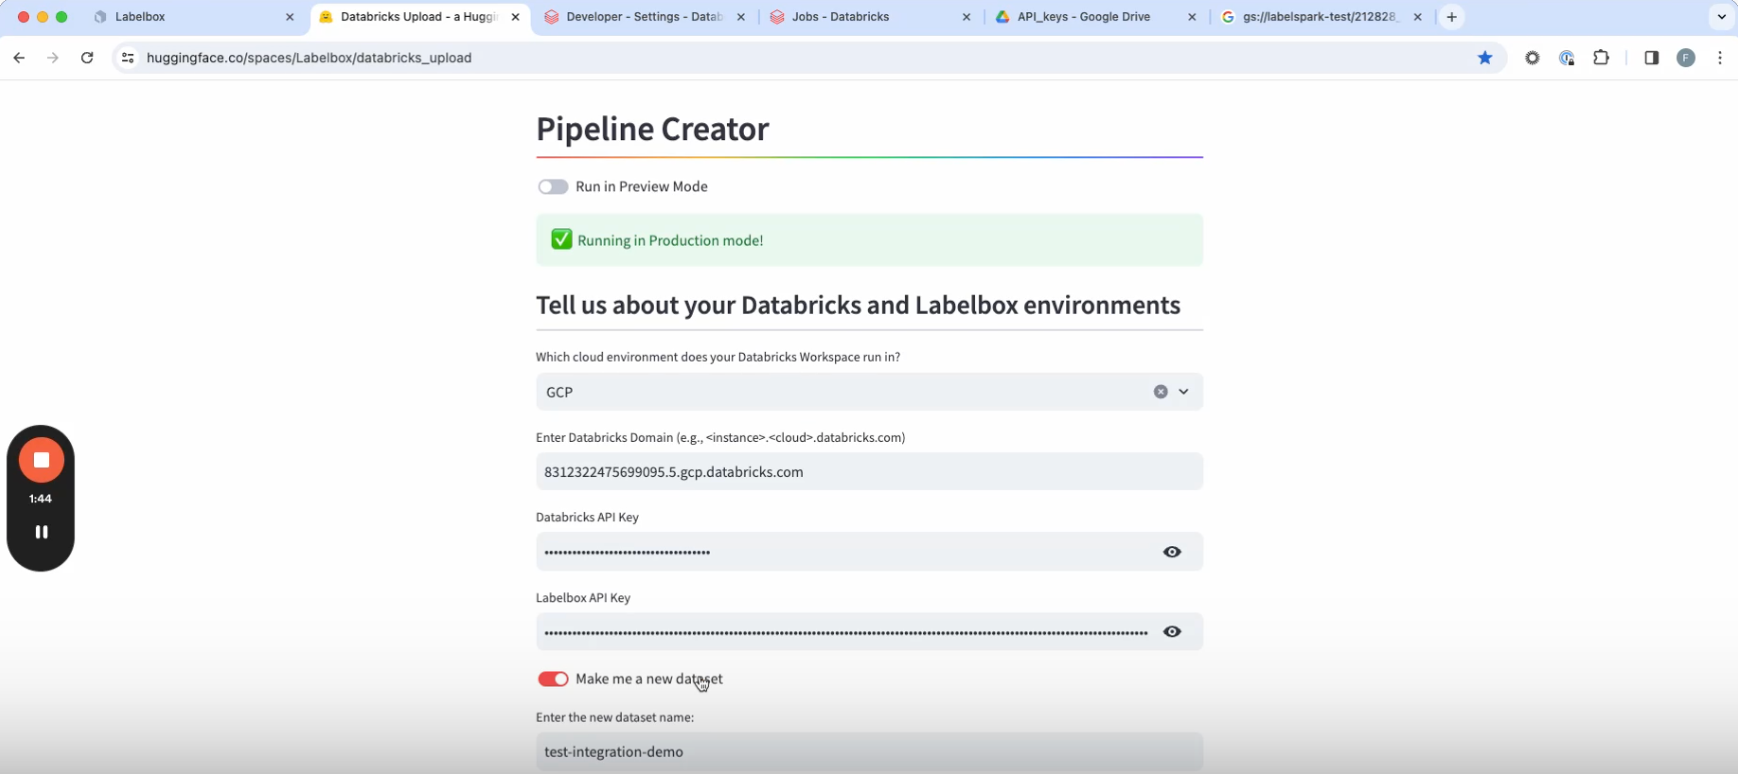
1. Navigate to the pipeline creator webpage and enter your Databricks domain. You can find this by going to your Databricks environment. The domain will be in the URL, so you can copy and paste it into the pipeline creator.
2. Now select the cloud environment that your Databricks workspace runs in. This information is usually also in the Databricks domain that you just copy/pasted.
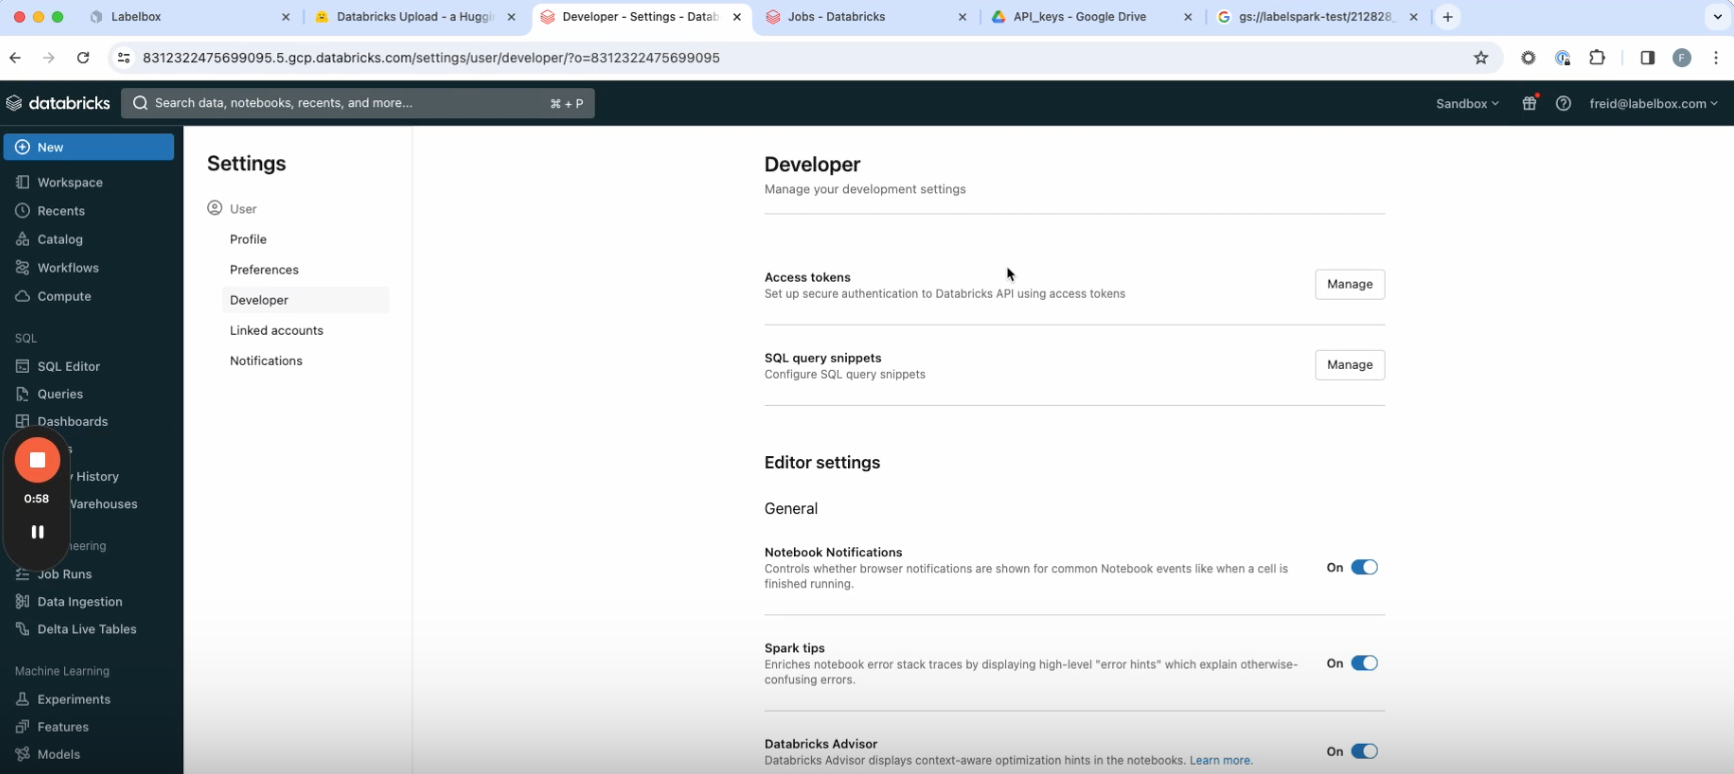
3. If you don’t already have a Databricks API, create one by going to your Databricks domain. Go to the user tab in the top right, then go to User settings > Developer > Access Tokens, and create an access token. Paste your Databricks API key into the pipeline creator.
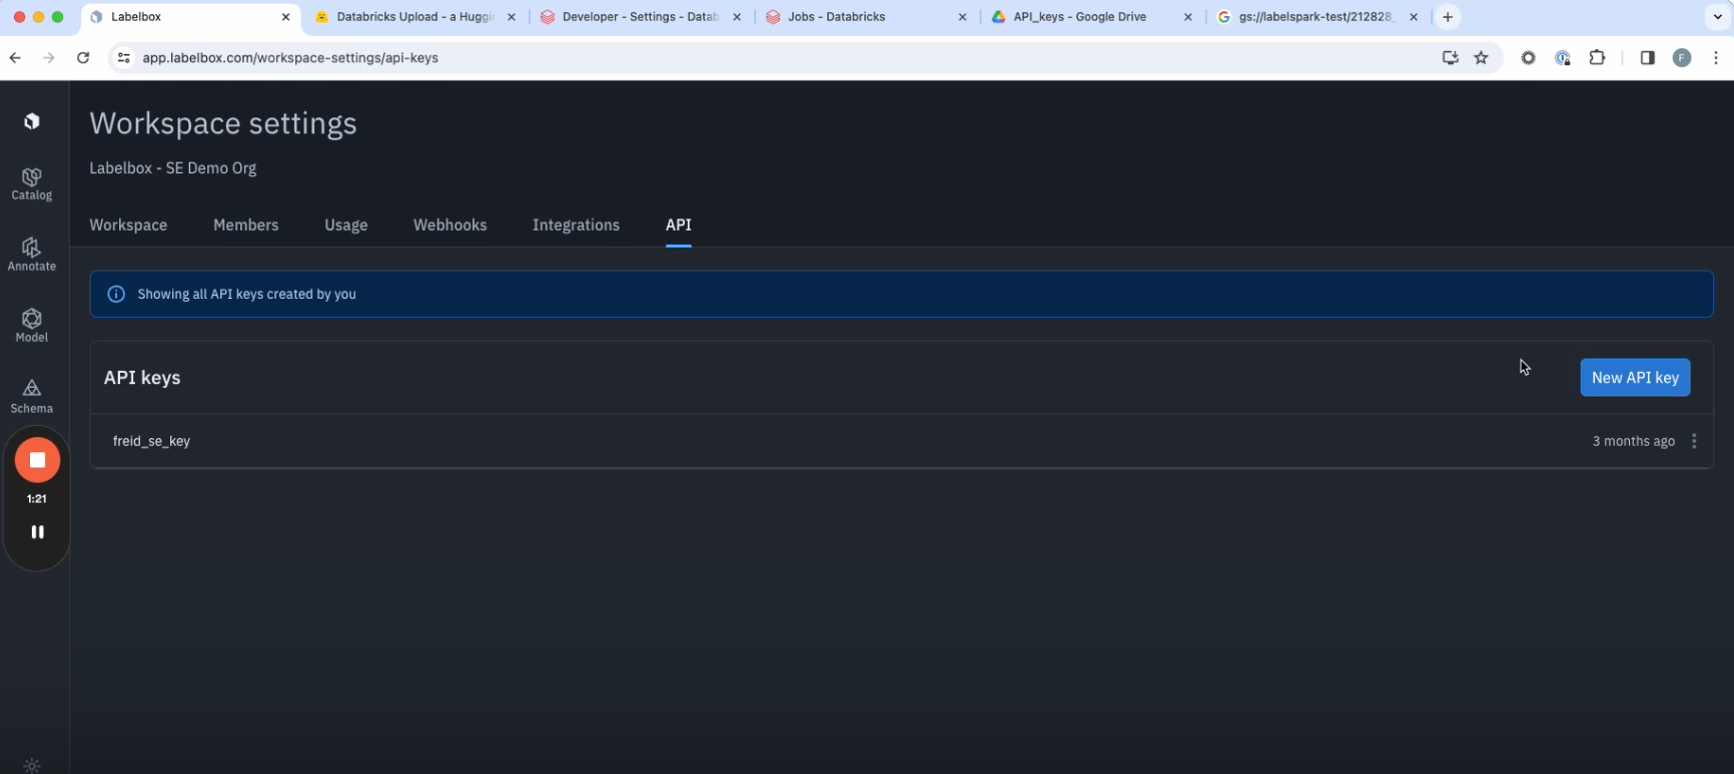
4. Next, you’ll need your Labelbox API key. If you don’t already have one, you can create one from within your Labelbox environment by going to Workspace Settings > API > Create a new key. Paste this key into the creator pipeline.
5. Next, the pipeline creator will give you the option of making a new dataset or appending an existing one. Be sure to give the dataset a relevant name, as it will appear under than name within Labelbox Catalog once the dataset has been created and the data ingested from Databricks.
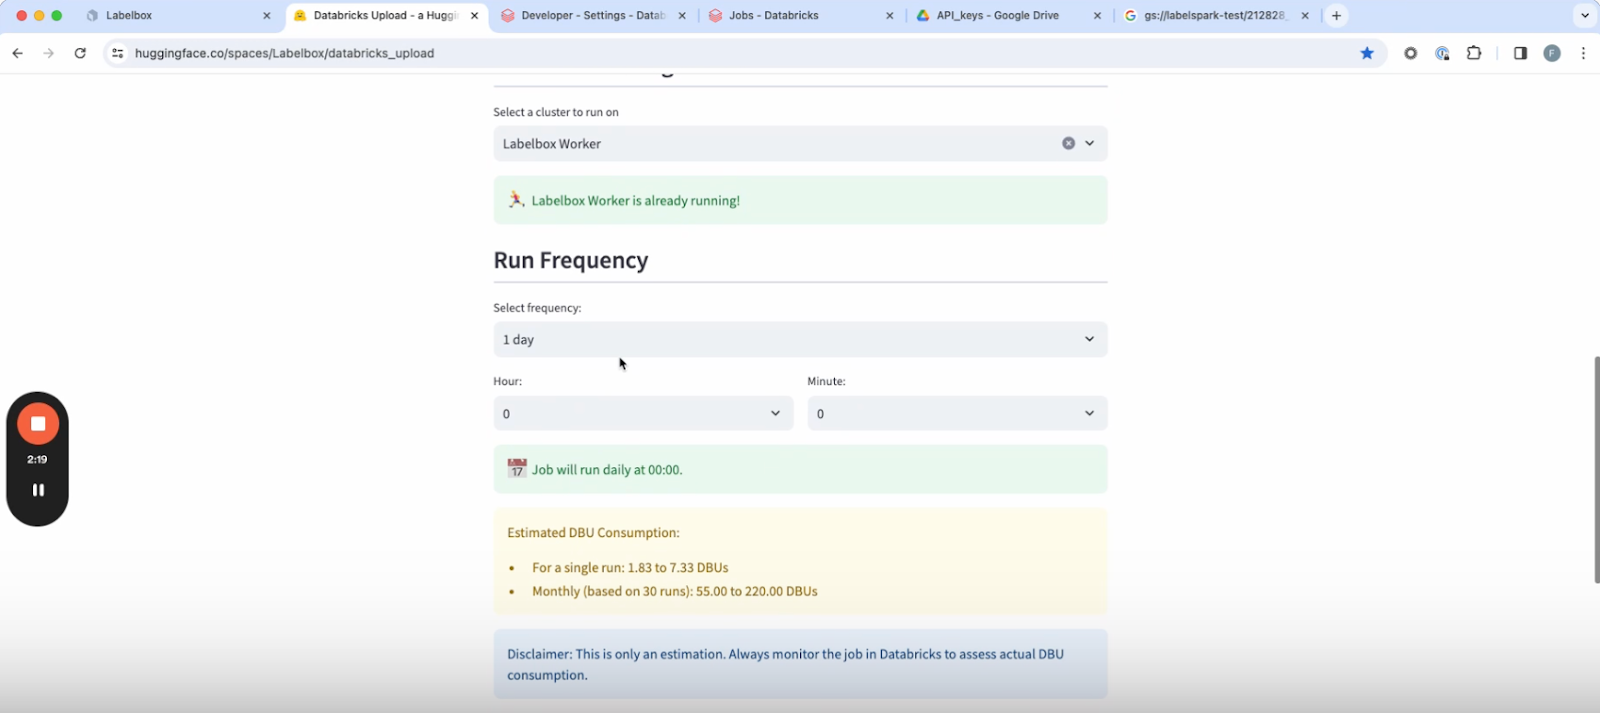
6. Select a cluster from within your Databricks environment on the pipeline creator page.
7. Once the cluster is ready, you’ll see the option to select a run frequency, or the cadence with which the workflow is going to execute.
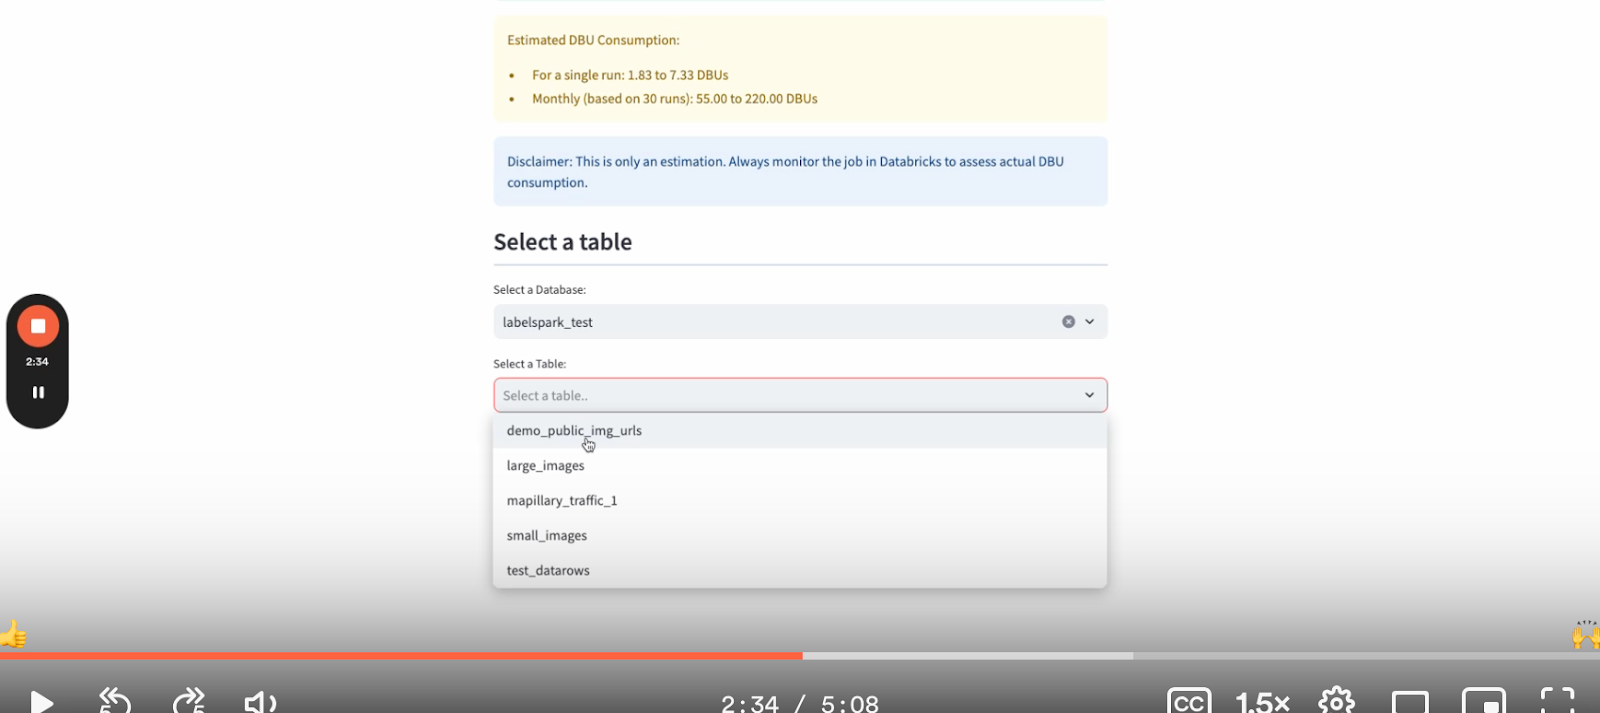
8. Next, choose the relevant table and database in Databricks from which you want to pull data.
9. The page will show you a sample of data rows within the selected table. The row data column signifies the URL by which you want to pool the data from. This can either be a public URL or objects hosted within your cloud storage.
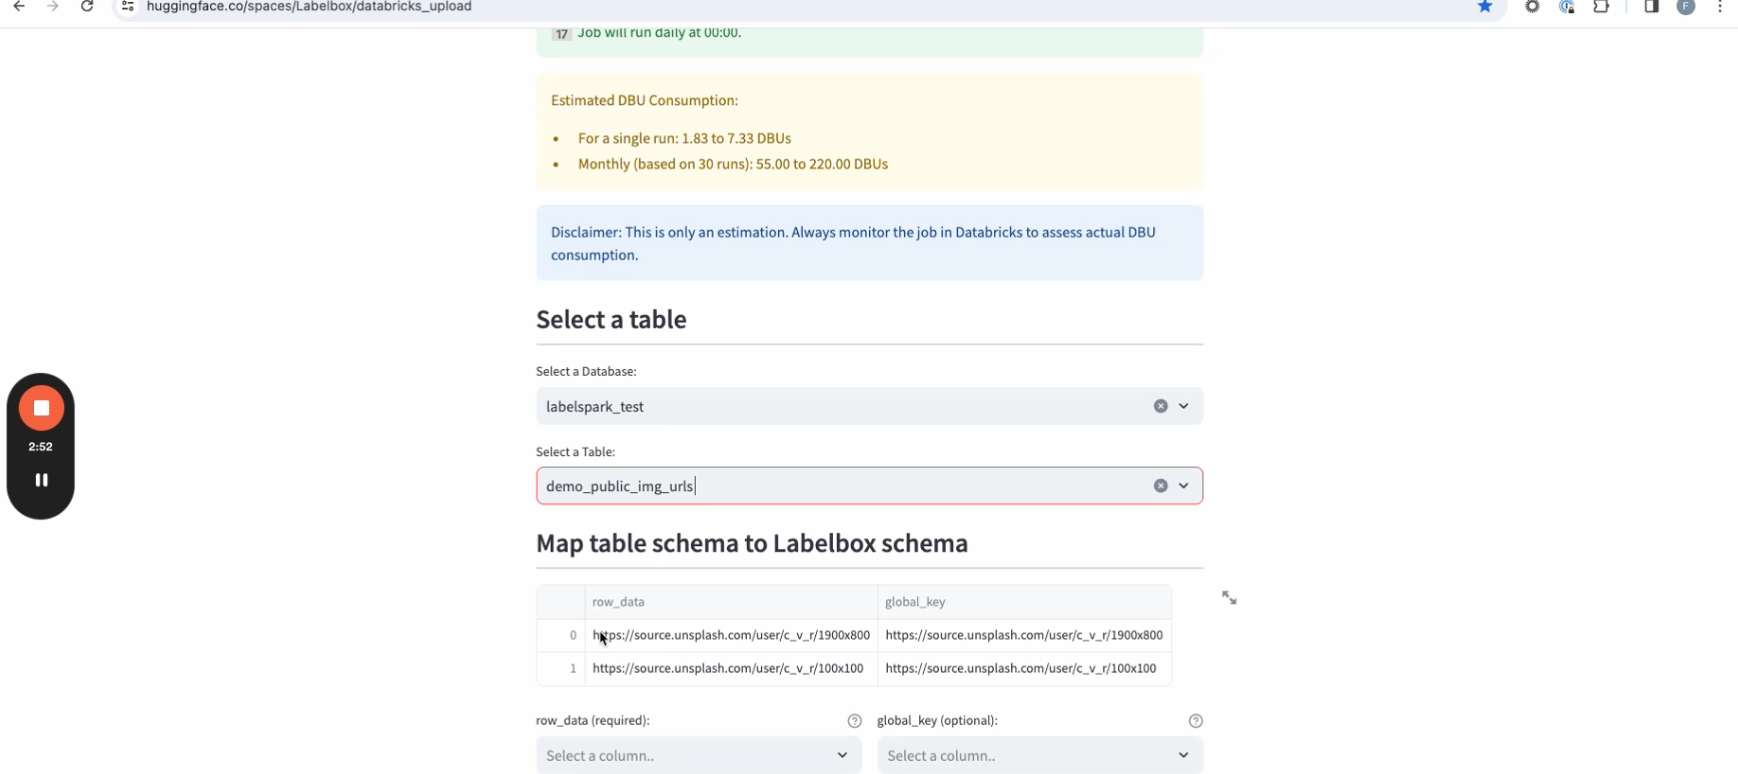
10. Choose the data row column pointing to the object that you want to render. You also have an additional option of choosing the global key, which will specify the unique identifier assigned to each data row once they’re ingested into Labelbox.

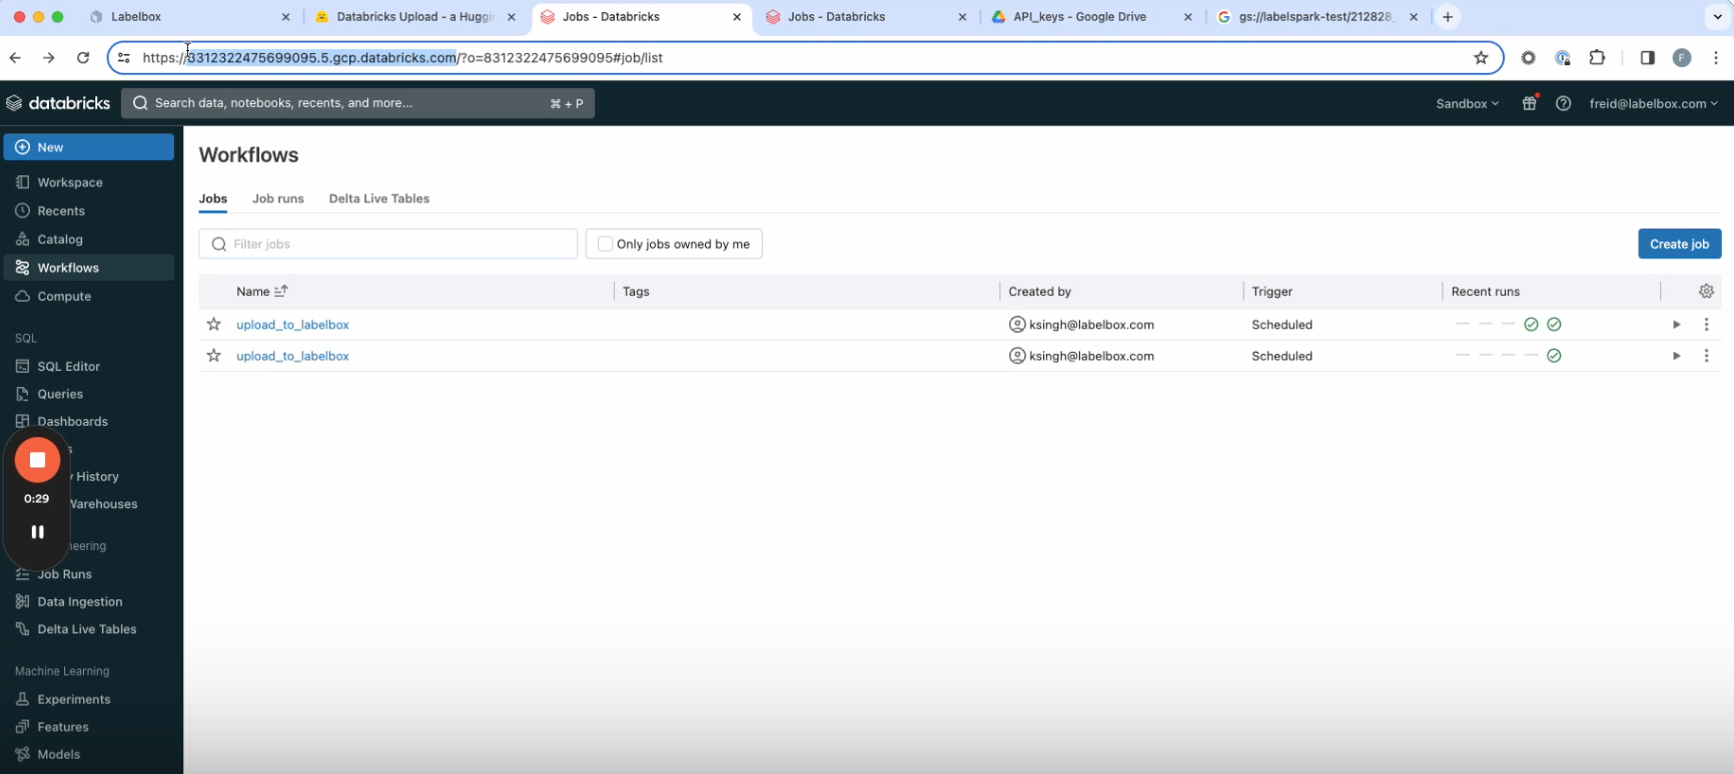
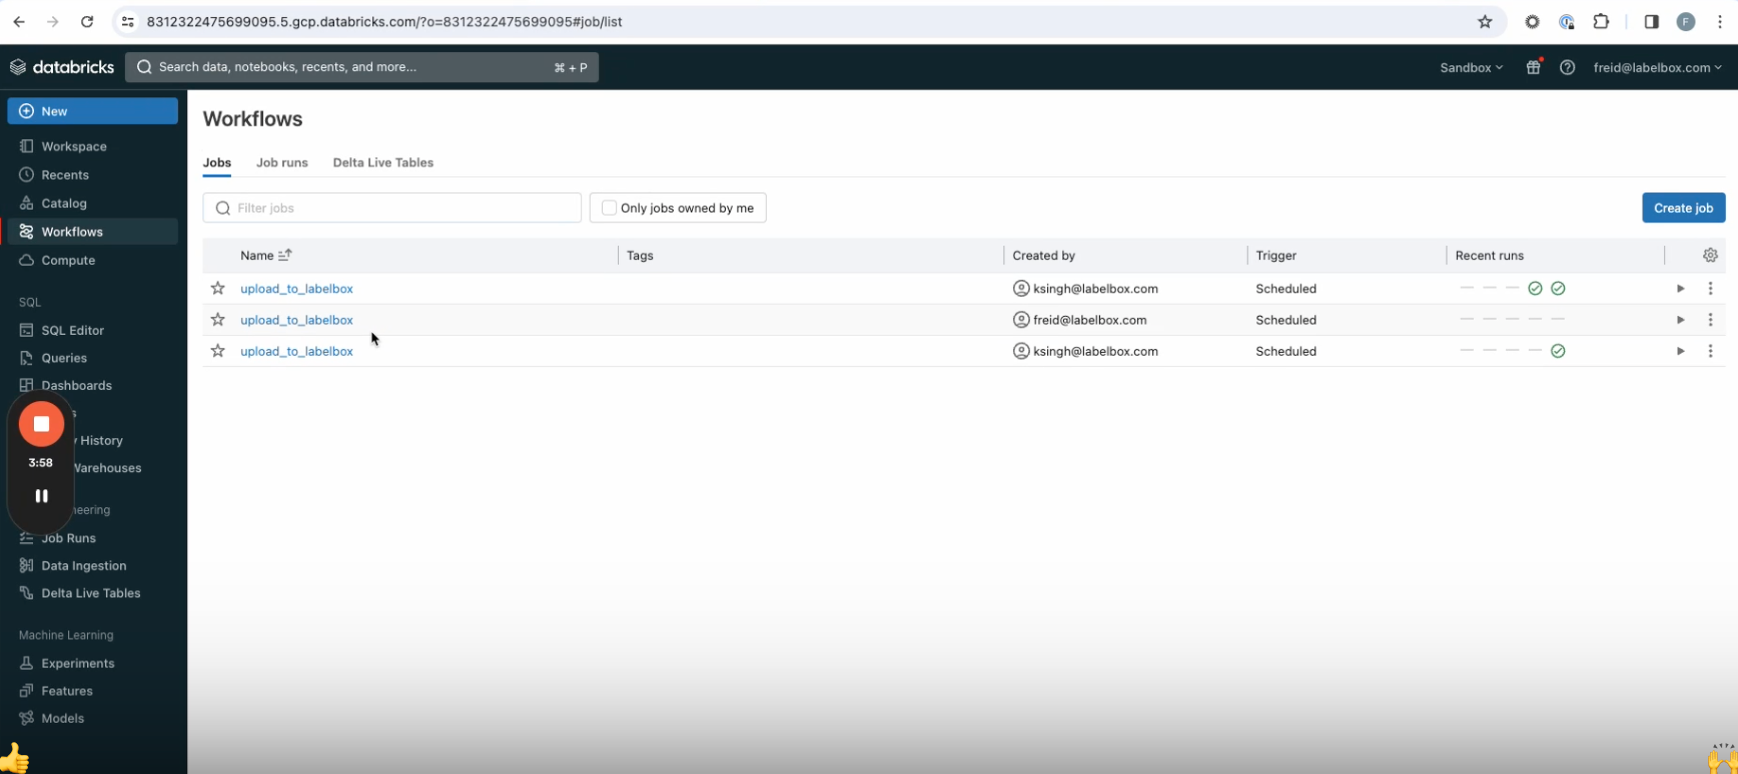
11. Click on Deploy pipeline. After executing for a few seconds, you’ll see a confirmation that your pipeline has been deployed. Now you can navigate to your Databricks environment, go to the workflows tab on the left, and see the new upload workflow that you’ve just created. Once the workflow has run, you’ll be able to see the ingested data in Labelbox Catalog.
Your new workflow will now ingest the specified data into Labelbox at the cadence you chose. Read this blog post to learn more about how you can integrate Databricks and Labelbox into a seamless data engine for AI.