All guides
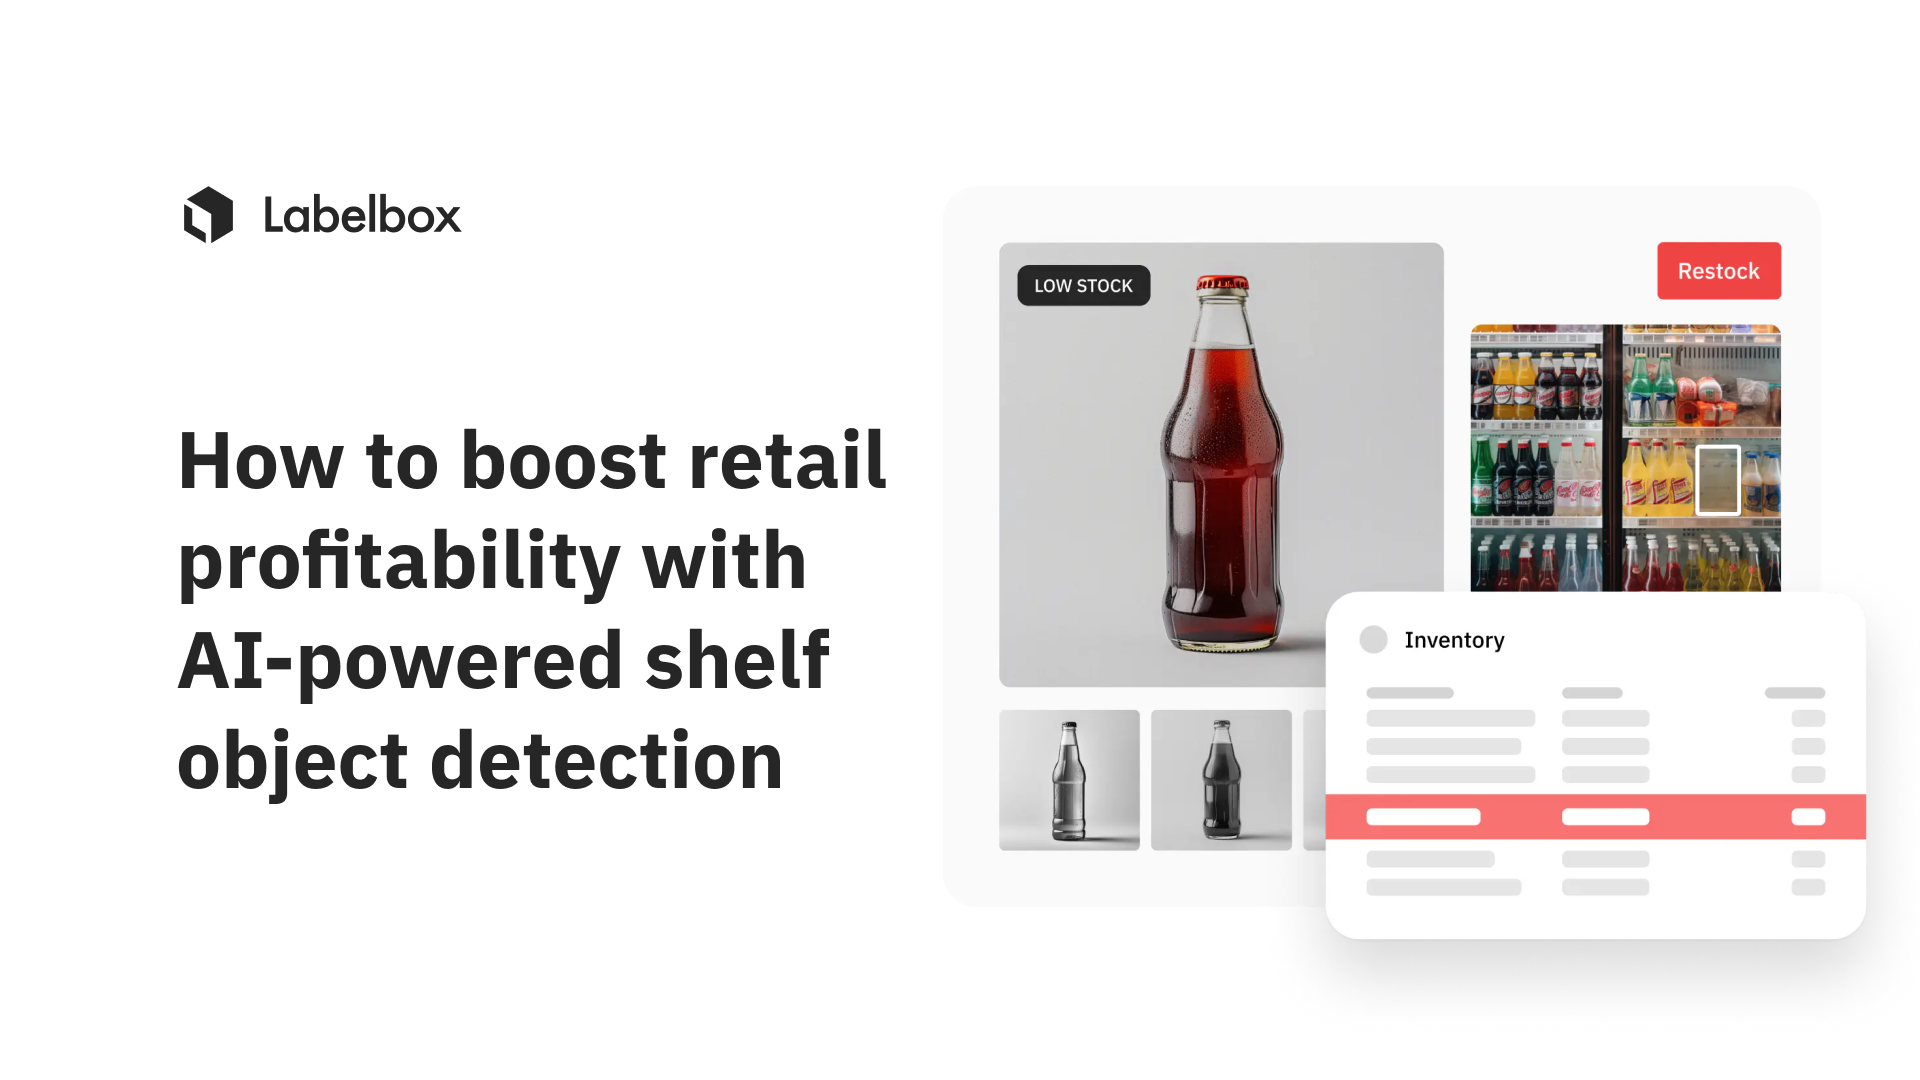
How to boost retail profitability with AI-powered shelf object detection
For today’s retailers facing intense competition and thin margins, optimizing shelves is a high-impact yet often overlooked opportunity to directly boost sales, enhance in-store experience, and enable better data-driven decisions across the organization. However, manually monitoring and checking shelves can be an inefficient process that limits productivity and prevents real-time insights across stores nationwide.
By applying AI and computer vision for automated shelf monitoring, retailers can unlock the benefits of real-time shelf optimization at scale. With data-driven insights into inventory levels, pricing, product placement, and more, they can make better decisions around merchandising, improve customer satisfaction, optimize supply chain operations, and ultimately drive higher productivity and profitability. With real-time insights and efficiency gains, retailers can look to improve sales by millions of dollars per year leveraging AI.
However, building and scaling an effective AI-powered shelf detection solution can pose the following key challenges for retailers:
- Data quality and quantity: Building accurate computer vision models for a shelf optimization use case requires vast amounts of high-quality labeled images – being able to capture shelves with a diverse product range, from various distances and angles. Collecting, organizing, and labeling this data can be expensive and time-consuming for retailers.
- Cost & scalability: Deploying models across hundreds or thousands of retail locations can require significant investment. As shelf inventory rapidly changes, keeping models accurately trained and scaled can incur costs.
- Lack of machine learning expertise: Many brick and mortar retailers might not have access to engineering or machine learning talent. Without the right expertise, it can be difficult to develop automated shelf-monitoring solutions needed to drive value for shelf management.
Labelbox is a data-centric AI platform that enables retailers to rapidly develop accurate computer vision models for automated shelf monitoring allowing for real-time monitoring across stores. Rather than spending valuable time building an in-house solution or relying on disparate systems, retailers can leverage Labelbox's end-to-end platform to label high-impact data, ensure model accuracy, and continue to evaluate the effectiveness of models in production.
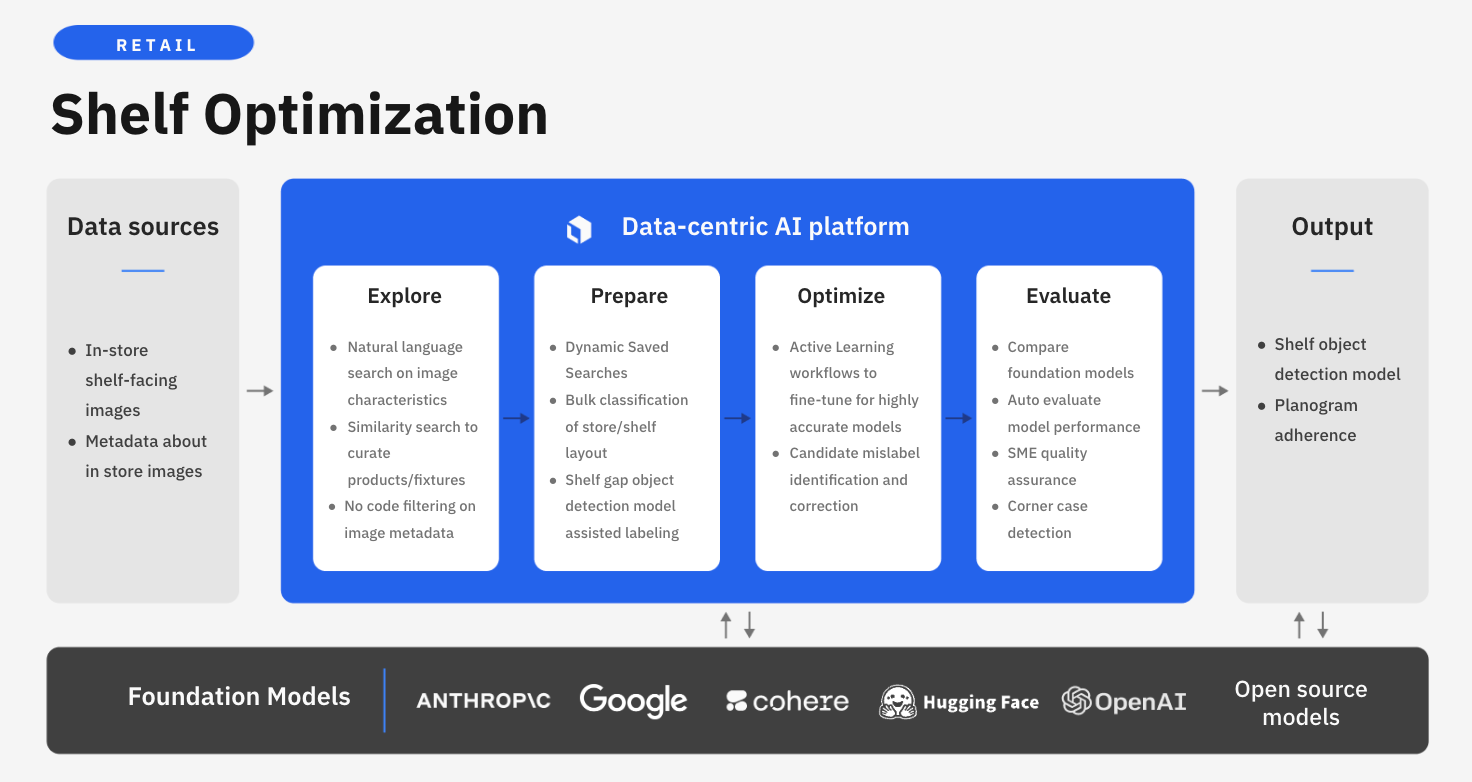
In this guide, we’ll walk through how your team can leverage Labelbox’s platform to build a shelf object detection model, empowering you to make more precise merchandising decisions, enhance customer satisfaction, optimize supply chain operations, and in turn, boost productivity and profitability.
See it in action: How to build a shelf object detection model
The walkthrough below covers Labelbox’s platform across Catalog, Annotate, and Model. We recommend that you create a free Labelbox account to best follow along with this tutorial.
Part 1: Explore and enhance your data: Google Colab Notebook
Part 2: Create a model run and evaluate model performance: Google Colab Notebook
Part 1: Explore and prepare your data
Follow along with the tutorial and walkthrough in this Colab Notebook. If you are following along, please make a copy of the notebook.
Ingest data into Labelbox
As a retailer, you might have hundreds of images captured on shelves from various stores stored in a cloud bucket or as a local folder of images. In order to upload the desired images of shelves to Labelbox, you have the option of:
1) Using the Google Colab notebook, upload the CSV of images and metadata to Labelbox
- Input your Labelbox API key into the provided Google Colab notebook.
- Select ‘Runtime’ in the navigation bar and hit ‘Run all’ to bring the selected amount of data rows into your Labelbox Catalog — where you can browse, explore, and curate the data for insights and model development.
2) If you have a dataset from your local file, you can upload it through the Labelbox UI by clicking ‘new dataset’ in Catalog.
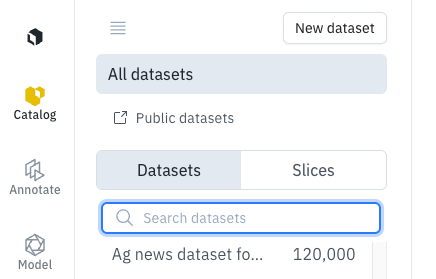
Once you’ve successfully uploaded your images, you can browse them in Catalog - along with image metadata such as Date, Time, Store ID, Camera View, and more. You can visualize your data in a no-code interface to quickly pinpoint and curate data for model training.
Search and curate data
You’ll now be able to see your dataset in Labelbox Catalog. With Catalog, you can contextualize your data with custom metadata and attachments to each asset for greater context.
Leverage custom and out-of-the-box smart filters and embeddings to quickly explore product listings, surface similar data, and optimize data curation for ML. You can:
- Search across datasets to narrow in on data containing specific attributes (e.g metadata, media attributes, datasets, project, etc.)
- Automatically find similar data in seconds with off-the-shelf embeddings
- Filter data based on natural language and flexibly layer structured and unstructured filters for more granular data curation
Create a labeling project in Annotate
1) Create an image project in Labelbox Annotate.
2) Sample and send your uploaded dataset as a batch to your newly created project.
3) Create an ontology to determine how to structure your data. If you have a previous ontology you’d like to use, you can do so. If not, you’ll need to create a new ontology. To create a new ontology:
- Add a class. For this use case we’ll want to add bounding boxes
- Pick a name for the class. For this use case we’ll be detecting empty spaces on shelves, so we can create two bounding box classes named ‘empty’ and ‘product’ respectively
4) If you’re relying on an external team of labelers or want to provide your internal labeling team with more instructions, you can upload instructions as a PDF for your labelers during the ontology creation process.
Label the data of interest
Now that we have a project with our data set up in Annotate, we’ll need to label this training data. With Labelbox, you can label your data in the following ways:
1) Internal team of labelers: your team can start labeling directly in the Labelbox editor, utilizing automation tools and maintaining quality with custom workflows to maintain human-in-the-loop review.
2) External team of expert labelers with Labelbox Boost: leverage our global network of specialized labelers for a variety of tasks.
Workforce Boost provides a collaborative platform for labeling services in a self-serve manner – this is great for teams that don’t have the technical expertise to build a machine learning system yet are looking for an easy-to-use technology to get a quick turnaround on quality training data. You can learn more about our Boost offerings here.
3) Create pre-labels with foundation models
With Labelbox, you have the ability to send model predictions as pre-labels to your labeling project. This can be done in one of two ways:
- Model-assisted labeling: With model-assisted labeling, you can import computer-generated predictions (or simply annotations created outside of Labelbox) as pre-labels on an asset. The imported annotations will be pre-populated in the labeling editor and a human can correct or verify and submit the prediction as ground truth.
- Model Foundry: With Model Foundry, you can automate data workflows, including data labeling with world-class foundation models. Leverage a variety of open source or third-party models to accelerate pre-labeling and cut labeling costs by up to 90%.
Part 2: Create a model run and evaluate model performance
Follow along with the tutorial and walkthrough in this Colab Notebook. If you are following along, please make a copy of the notebook.
Create a model run
Once you have your labeled data in your project in Annotate, you’re ready to move on to creating a model run in Labelbox Model.
Model training occurs outside of Labelbox. Labelbox Model works with any model training and inference framework, major cloud providers (AWS, Azure, GCS), and any data lake (Databricks, Snowflake).
We’ll be using this Colab notebook to train a model on the training dataset and bring back inferences from the trained model for evaluation and diagnosis.
For this step, you will need:
- Your Project ID (located in the URL)
- Your API key
The Colab notebook will modify the output layer of a YOLOv5 algorithm and train data on the provided project’s labels. To do so, you’ll need to:
1) Input your API key and project ID into the notebook
2) Name your model
3) Ensure that the ‘MEA’ field is ‘true’ and ‘MAL_upload’ and ‘Label_import’ fields are ‘false’
Once those are inputted, you can select ‘Runtime’ in the navigation bar and hit ‘Run all’ – the notebook will pull all of the labels into this environment, fine-tune YOLOv5 on your use case and import those predictions back into Labelbox Model.
You’ll be able to view the model in the ‘Experiments’ tab in Labelbox Model – you can view ground truth predictions in green and predictions in red.
Evaluate and diagnose model effectiveness
Diagnose model performance with model metrics
A disagreement between model predictions and ground truth labels can be due to a model error (poor model prediction) or a labeling mistake (ground truth is wrong).
- After running the notebook, you’ll be able to visually compare ground truth labels (in green) to the model predictions (in red).
- Use the ‘Metrics view’ to drill into crucial model metrics, such as confusion matrix, precision, recall, F1 score, and more, to surface model errors.
- Model metrics are auto-populated and interactive. You can click on any chart or metric to open up the gallery view of the model run and see corresponding examples.
- Use Labelbox Model for 10x faster corner-case detection – detect and visualize corner-cases where the model is underperforming. For example, you can drill into cases where ‘empty’ objects are not predicted, where the model might have difficulty identifying empty spaces on shelves where there is a wire mesh material present.
After running error analysis, you can make more informed decisions on how to iterate and improve your model’s performance with corrective action or targeted data selection.
Curate high-impact data to drastically improve model performance
Once you’ve identified an example of a corner-case where the model might be struggling, you can easily leverage Catalog to surface similar unlabeled examples to improve model performance.
- Select any corner-cases and select ‘Find similar in Catalog’ from the Manage Selection dropdown. This will bring you back into Catalog and will automatically surface all similar data rows (both labeled and unlabeled) to the selected example.
- To only surface unlabeled images that you can send to your model for labeling, you can filter on the ‘Annotation is’ filter and select ‘none’. This will only show unlabeled images that are similar to the selected corner case.
- Select all images that apply and send them as a batch to your original labeling project. Labeling these in priority will help improve model performance.
Compare model runs across iterations
Improve model development by up to 90% by leveraging Labelbox Model to compare model runs across iterations to track and quantify how model performance has improved over time.
With new high-impact data labeled, you can retrain the model using the same steps with the Colab notebook on this improved data set. You can track model improvements across various runs for comparison and how this has affected model performance.
AI-powered computer vision enables real-time, scalable shelf optimization for retailers. By automating insights into inventory, product placement, and more, retailers can make smarter merchandising decisions, boost customer satisfaction, and increase sales by millions per year. AI shelf optimization unlocks greater efficiency, agility, and profitability.
Labelbox is a data-centric AI platform that empowers teams to iteratively build powerful product recommendation engines to fuel lasting customer relationships. To get started, sign up for a free Labelbox account or request a demo.